![]()
![]()
![]()
![]()
![]()
![]()
![]()
![]()
![]()


All my content and ptohos

Apple computers - General information
General old Mac FAQ by MCbx.
0. What to do first with an old Mac?
1. RAM Expansions
2. Macintosh generations
3. What operarting system for my mac?
4. Where to get OS for my Mac?
5. What is a System enabler?
6. How to salvage data/programs from my Mac?
7. What hard drive should I use?
8. How to make system floppies?
9. How to install Operating System?
10. CD-ROM Booting
11. Macintosh video connector
12. OpenFirmware Mac USB boot (installation of MacOS X from USB)
13. Connecting two Macs with cable.
14. Resetting administrator password in Mac OS X 10.5
15. Any useful links with hardware mods?
0. I got an early Mac. What should I do first?
First, check its voltage. 110V Mac will run with 240V for a minute and power supply will burn. Minimal damages: Capacitors and fuse. Don't connect it to wrong voltage.
Check BIOS battery. If it will leak, it'll damage mainboard permanently. Macintosh IIfx requires both batteries to start up
If you have problems with running "fridge" Macs, here are some of them. If you plan to mess with or upgrade the Mac, find a service manual for it (PDF from Apple, looks a bit like a presentation).
If you are more into electornics, early 68K Macs have some schematics from services in Apple (se here), but for Macintosh Classic, Classic II, Color Classic, II, IIci/cx/fx/si, LCII, LCIII, and Quadra 840AV, there is one more solution. In 1980s and 1990s, a service information supplier Bomarc reverse-engineered some of these schematics. Some scans of these schematics were packed to tar.bz2 file. It is not easily accessible at archive.org (yet has an entry), but if you look for it, don't use a torrent client for torrent file, only remove the last part of address and be patient. Schematics are very unreliable as there were lots of mainboard revisions.
In Macintosh Classic, if you see two gray horizontal lines going thru properly working screen, broken solders of flyback transformer is the source of problem. Correct them with Mac turned off and discharged!
1. RAM upgrades
| Different Macs require different modules. Earliest ones
have just DIP chips. Since Mac Plus, it is possible to expand RAM with
30-pin SIMMs. Later, for a brief time, a 64-pin SIMMs were used, make
sure you don't plug the "other" 64-pin SIMMs, as there were two kinds of
them, made by two companies for two different computers (Apple and GVP).
Later, they switched to 72-pin SIMMs, and here it is only important to place them in pairs and according to manual. There is usually no single-SIMM working capability. With PowerPC Macs, DIMMs started to be used. These DIMMs are a bit different than these for a typical Pentium II - they are SIMM-like EDO or FPM 5V chips on a DIMM stick. Later, since G3, a PC66 DIMMs started to be applied. Power Macs G3 use these DIMMs, and some G4s too. Starting from G4 MDD, DDR modules have been used. |
|

2. What generations of Macintosh computers were there?
The first generations of Macintosh used Motorola 68000
processors and their successors: 68020, 40 etc. They are known as 68K Macs.
First 68K Macintosh computers had characteristical case with built-in 9" CRT
monitor. They're known as "Fridges" and they're usually Motorola 68000 based
with up to 4MB of RAM. Screen was usually monochrome.
In 1987 Apple released another generation of 68K Macs, with desktop housings.
They were equipped with better CPUs, but still Motorola 68K series. They are
known as "pizza boxes", although first units were bigger (higher) than classic
pizza box Macs.
| In 1994 Apple released Power Macintosh 6100, it was the first
Mac which used Motorola PowerPC CPU instead of 68K. Power Macs are in desktop or
tower cases, some models (such as Performa series 5260) are equipped with
built-in CRT, so they look like "fridge" models with bigger screens. The last "conventional"
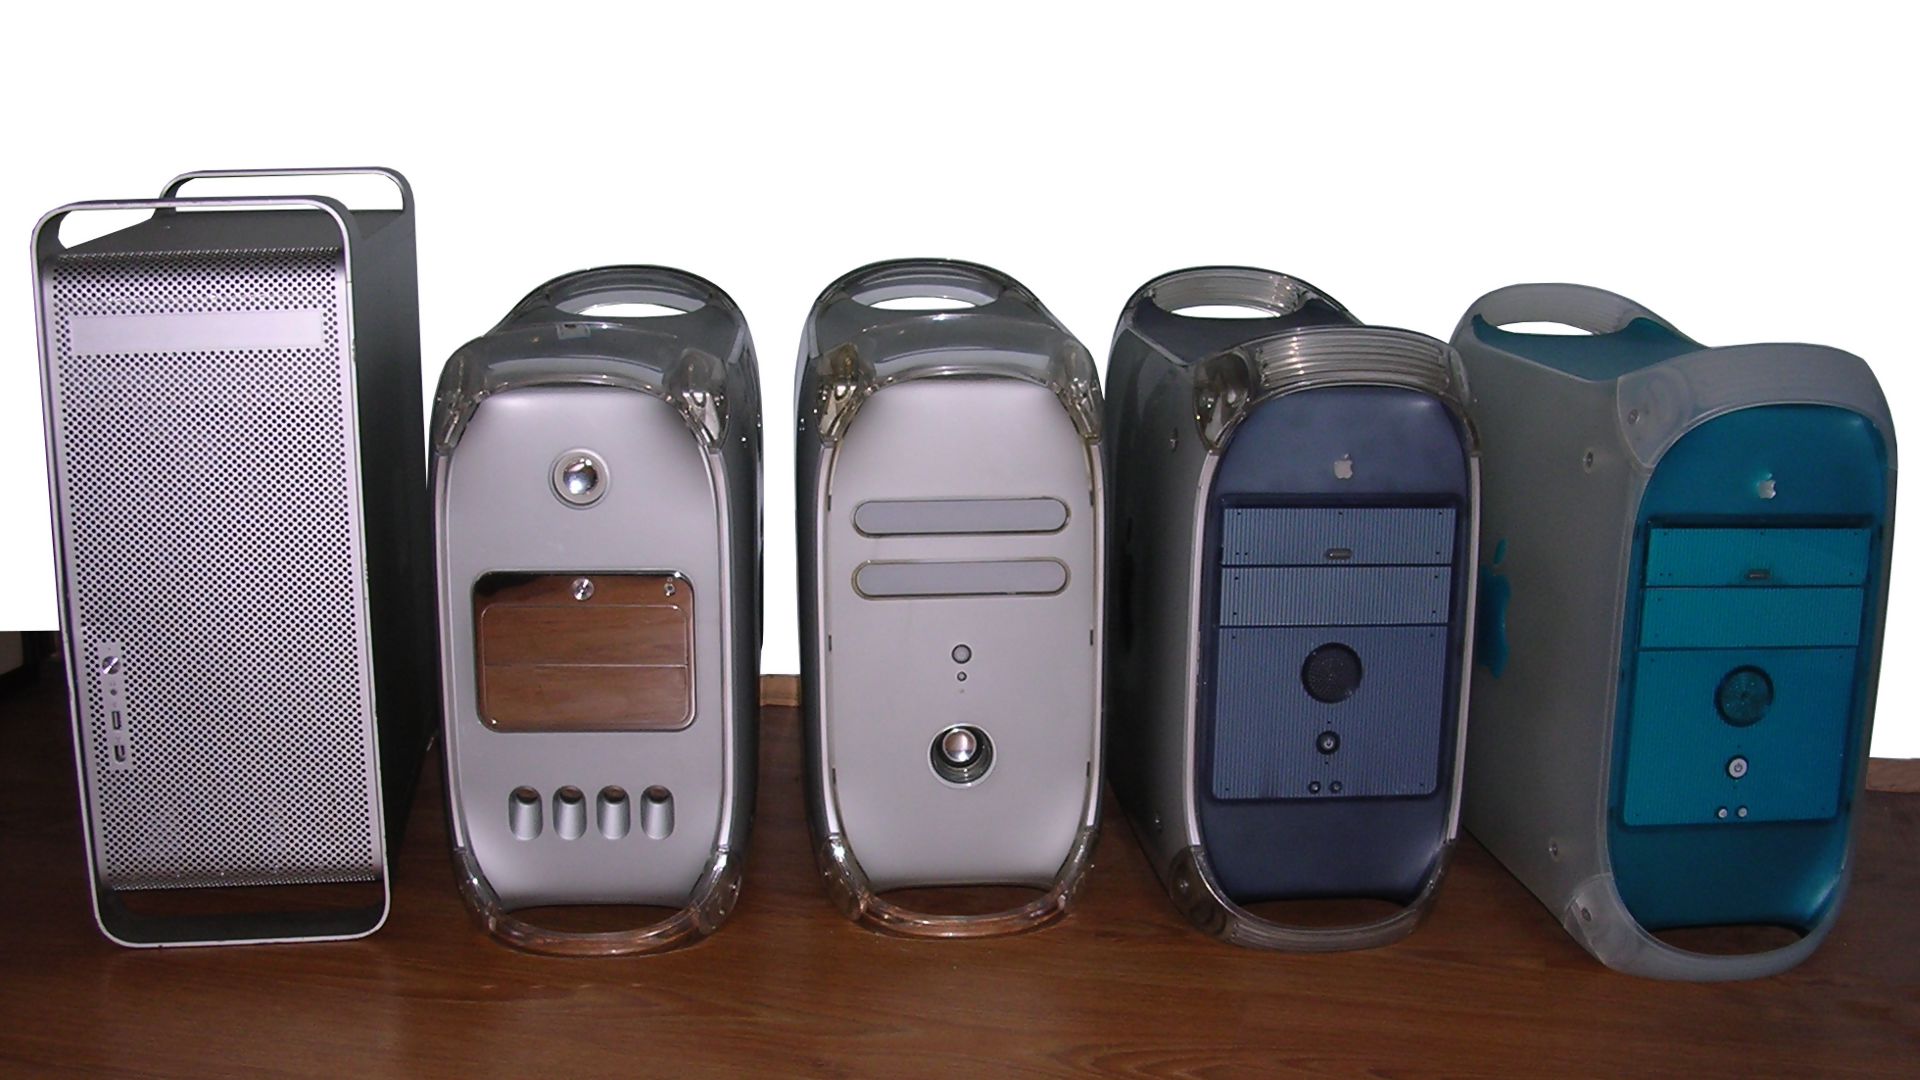
PowerPC models from 1998 were equipped with PowerPC G3 CPU. With releasing iMac in 1998, Apple released a re-vamped series of Power Macs in translucent plastic tower cases, this line is from G3 and continues to G5. In the picture on the right you can see (from the right) first G3, G4, G4 Quicksilver, G4 MDD and aluminium G5 models. |
|
In 1998 Apple released iMac, a computer designed from scratch as a machine for normal user, ready to be used right after unpacking. First iMac had PowerPC G3 233MHz CPU and was ready for normal Internet connection. Earlier PowerPC Macintosh computers had AAUI network port which required a special adapter and advanced configuration. In parallel there were G3 Tower computers with new design.
After these iMacs Apple released anothe ones with better CPUs. They are known as "slot-loading iMacs" as they used slot-loading CD-ROM drives instead of tray-loading used in early iMacs.
Next generation of iMacs and Power Mac towers used G4 CPUs. For education Apple released eMac computers. In 2000 Apple started with G4 Cube, but it was not much popular.
In 2006 Apple started to use Intel Core CPUs instead of PowerPC.
3. So What operating system should I use with my Mac?
Mac OS, earlier known as Macintosh System. Every Mac has its own maximum OS version it can run, but usually it's not good to run the newest OS for Mac - as memory requirements may slow the machine down. Early 68K Macs with up to 4MB RAM usually support OSes up to 7.5.x, but installing it makes the computer really slow. You should install version 6.x.
Later models with Motorola 68 (2,3,4) 0 are good with Mac OS 7, but they really should have more than 4 (or 8) MB of RAM. Especially Mac OS 7.5.3 known as Unity is good above 8MB of RAM.
Power Macs G3 and early iMacs may be used with Mac OS 8 or 9. If they have less than 64MB RAM Mac OS 9 will be quite slow, but usable. 128MB allows very comfortable use of version 9. Try to get to 9.2, as this is the last one and it works well.
In e/iMacs and Power Macs with CPUs better than 350MHz and more than 256MB of RAM you can try Mac OS X. To 10.2 or 10.3, system used less resources than earlier X versions (10, 10.1). 10.5 is the last version which runs on PowerPC Macs, I'm successfully using it on my Power Macintosh G4 MDD (1GB RAM, 1.25GHz).
The good news is that many Macs work with PC RAM, so you can pop the module in, test (see links to memtests) and if it doesn't hang you're ready.
4. Where to get Macintosh System?
From Apple :). If you have an older Mac, you can download English OS for it from Apple's website.
The newest thing you can get is 7 series, see there, get to /Apple_Support_Area/Apple_Software_Updates/English-North_American/Macintosh/System/and go to "Older System". You can download English releases of system 6, 7 line and 7.5 line. With updates you can pump it to 7.6, but 7.5.5 is usually enough for older Mac with less memory.
Polish 7.01 is was accessible at
download.info.apple.com/Apple_Support_Area/Apple_Software_Updates/Polish/Macintosh/System/
(see information Here). There was 7.5.3 with all updates available, but currently you can only
get it at Warez/abandonware sites (although as it was shared once by the autor, it's not
warez according to Polish law).
System 8, 9 and 10 is currently (2012) impossible to download legally for free. Polish language patch for Mac OS 9 can be downloaded here.
At
www.info.apple.com/support/oldersoftwarelist.html (see the information
Here) Apple offers
offered lots of driver disks and Mac upgrades for its older
products.
If you plan to install software from floppies, be sure to grab a boot disk which works on all computers. It's known as Network Access disk and can be freely downloaded here (from Apple). It can save many tries with bootdisks before installing System.
5. System Enablers - what is this?
System enablers are small files allowing older Macintosh operating system to
be run on newer hardware. Older system is not prepared for newer hardware, so it
won't know how to use it, and it needs System Enabler file to get information
how to use the base hardware. If it won't find it, it'll display message that
newer OS is needed at boot-up. To make it run, you have to copy required enabler
to System Folder in your boot floppy (better use backup floppy instead of
original disk). After OS installation
remember to check is the Enabler included in System Folder on hard drive.
Ususlly it's not and you have to copy it manually to the hard disk or Mac will
not boot!
Here is the complete list of what enablers goes for what computers.
And here is the disk which may help with these Macs:
| Centris 610, Centris 650 Centris 660AV Color Classic IIvi / IIvx LC III LC 475, LC 575 LC 520, LC 550 LC 630 Quadra 605 Quadra 610 Quadra 650 et Quadra 840V Quadra 630 Quadra 660AV, Quadra 840AV |
Performa 600 Performa 450, 460, 466/7 Performa 475, 476, 575, 577/8 Performa 550, 560 Performa 630, 635CD Performa 5200 Series, Performa 5300 Series, Performa 6200 Series, Performa 6300 Series Performa 6400 Powerbook 160, 160c, 180, 180c Mac II, IIx, SE/30 with OS 7.1, PMMU installed and equal or more than 4MB of RAM (32-bit enabler) |
To install System enabler to the disk, boot computer from floppy and copy the enabler file to System Folder on hard disk. The same way you prepare floppy for your computer, but now you have to copy file to floppy disk in emulator.
6. How to get data from Mac?
How to salvage data and programs from Your Macintosh.
The most important thing: If you have an old Mac with 400/800K drive, and you
have 400/800K disks, DON'T STICK IT INTO PC OR NEW (MacOS X) MAC! Disks may be
immediately destroyed even if the write protection hole is set! The
procedure for 400/800K disks is described much lower.
Why? New, especially USB drives are assuming you're reading high density disk.
A word about floppy drives
You should avoid using USB floppy drives in PCs. It's good to have access to PC
with a normal floppy disk drive connected to the mainboard. You may get
Windows 98 for it, or install a VM with Win98 to try with strange floppies,
because WinXP generally doesn't handle unknown filesystems on floppies well. For
example forget about imaging OS/2 XDF floppies in XP - you won't do it, system
will throw you an error over 1.75MB. If you compare the newest known
technologies in floppy drives to technologies from 1980s or early 90s, you may
see that it looks like another lightbulb conspiracy, this time to make consumers
buy USB sticks!.
First, you have to know that Mac files are built different way than PC files.
In PC, file is file, one structure of bytes. In Mac, every file is built of two
parts called forks. Data fork is the file itself, its contents. Resource fork is
a record of information about file: Name, Size, Icon, Icon's attribute (color),
and creator ID - information, similar to PCs extension, instructing Mac what
program can open this file.
If you try to copy a Mac file into PC some way, you'll probably loose resource
fork. If it's program file, this program won't work. Document - will not be
opened because it will be forgotten what application opens it. That's why Mac
files shouldn't get in close contact with PC. They should be archived or Mac
disks should be imaged on the Mac, before contact with PC filesystem.
The good thing is that some files may be safely stored in PCs hard drive.
They're:
- Mac disk images
- StufIT Archives
- Some Mac disk images (.image files).
1.4MB Macintosh disk can be read into PC using PC's floppy drive. This disk
image may be restored into another floppy.
The format good for PCs is the binary dump of a whole floppy disk made by
RaWrite (local mirror of Windows version
here)
application commonly found on the net. More, if you give DSK extension to the
image and feed to Basilisk, Basilisk will support it as disk!. Many ".image"
files you can find on the net can be opened by Basilisk (after renaming to dsk)
but RaWrite won't make proper floppy from these (bad geometry). So you have to
make a floppy in Basilisk by copying it in virtual Mac OS.
You can view image contents and throw it between Apple disk images using HFV
Explorer (local mirror here), which you should know
after messing with Basilisk. Just open the file in HFVExplorer and it'll pop
into the list.
If you have a classic Mac, it's always good to have another little Mac inside
PC. For floppy preparation, checking software etc.
We won't discuss StuffIt here, as although it's quite common format in Mac's world, it's quite dangerous. For example StuffIt 4, the last one compatible with old 68000 Macs, generates files incompatible with all later versions.
So if you got a Mac check first if it boots to desktop with icons. If it is, good - we can salvage data from it. If not, for example it hangs on System startup screen (there could be many reasons, for example looking for not existing serial network connection), we have to put another system on HDD.
How to copy the limited MacOS to perform data recovery? (if your Mac boots to
desktop ypu can skip this paragraph)
Boot the Mac from Network Access Disk. Apple supplies it in difficult Mac
format, here is the disk image which can be copied
to disk using RaWrite. In fact, any Macintosh bootable diskette will do. After
successful booting from floppy go to the hard drive. To get data out of the Mac
you must have floppy drive free - you have to boot the computer from its hard
drive. In the hard drive, go to System Folder and look for file called System.
We have to discard this damaged system folder, making Mac not boot it. It's
simple - just remove it from directory, for example moving it to Trash. Rename
System Folder to, for example, System Folder Old.
Now copy the system folder from floppy to the root of hard disk. Go to it and
take the System file OUT, right to the root of hard drive. Moved? Now move it
back in. After Mac discovers System file being moved into directory, it'll take
this directory as System Folder and boot system from it. Reboot the Mac normal
way (from menu, not a button on case). It should spit the diskette out and you
should boot to your small OS.
Now we will copy needed software
Get THIS disk and make it with RaWrite. It contains
software for data compression. The first program on this disk (gray-green icon)
can compress files, make self extracting archives, and, the most important, can
split archives to parts if they're too large for one floppy. Put this disk to
your Mac and copy this program to the desktop.
GETTING PROGAMS FROM YOUR MAC
Make a folder on desktop, call it, for example, Transfer Me. Open it. In this
folder we will store, in subfolders, all things (usually programs) which we want
to transfer from this Mac. Now you have to carefully look through Mac's hard
drive and move interesting software (remember! to subdirectories!) to
subdirectories of our Transfer Me folder. It may take several hours, because:
- Someone may store few programs in one directory. - they need to be copied to
separate ones.
- Some morons store documents in program's directory. - they need to be deleted
or moved to another directory.
- Some programs may be stored as aliases. - they need to be discovered and real
programs must be copied.
The last possibility is worth explaination: Aliases are like Windows shortcuts,
but they're hidden better. Get object's information (Apple-I) to get info is an
object alias or not. You can also view directory "By Name" and you'll get info
for every file. Copying aliases, as copying Windows shortcuts, won't copy the
program!
After a few hours of tearing hair you should get a nice directory structure with
programs. But we're not finished yet. Macintosh program contains of the
following parts:
- Program directory with all its files - you have copied it
But the following items are required by some programs to run:
- Program's extension in Extensions folder
- Program's control panel in Control Panels folder
- Some programs have their fonts
- Program's preferences in Preferences folder
So now for every program you collected go to old System Folder and try to find
Extension, Control Panel, Fonts or Preferences. Move them to subfolders in
program's subdirectories (create ones, with suggestive names for example "Move
me to Extensions folder"). You may find some utility applications as lone
Extensions or Control Panels - copy them as separate programs. Don't copy the
software (control panels, prefs, extensions, fonts) from OS, as you probably
will reinstall it.
Difficult? In one of my Macs I spent more than 6 hours with it. But if you made
this complete collection, we're ready for another step: compressing data.
Run the archiving program you copied to the desktop and switch back to Finder by
clicking "Transfer Me" folder window or opening a new one by clicking on the
folder. View all directories in your "Transfer Me" folder by Name.
This is quite repeatable job: For every directory:
1. Select one
2. Apple-I to get info about its size
3. If it's smaller than 70K AND has less than 3 files you can skip compressing
it, it's directory will be copied to the floppy (compressing won't give good
results).
4. If it isn't - switch to compression program (if you can't see the window,
just click the icon in the top-right corner and select it from here).
5. File->New (Apple-N) then Archive->Add (Apple-G)
6. Go to Transfer Me folder, select previously checked folder. Click "Add" (or
something like that, definitely not "Add All"), then Done. The folder will pop
in the archive window.
7. File->Save.
8. Type its name as it appears in the directory name (you can omit difficult
characters), if it's the same, add " a" to the end.
9. Check "Create SFX" or "Self extracting" (the one checkbox in this window)
before clicking "Save"!
10. The compressed file will appear in "Transfer me" directory, so you can
delete archived folder.
11. If this archive file is larger than 1380-1390K, as Mac floppy, switch back
to the Archiver, File->Open, open this file, now Misc->Segment, select 10K
smaller than Mac floppy (like 1380K - old drives don't like far floppy tracks)
and save the file again AS SELF EXTRACTING. Close the archiver. As you have many
archives, you can delete the one-segmented archive.
Having archives, you can start copying. Format a floppy or two in Mac, and then:
1. Copy as much as possible to the floppy
2. Read the floppy to image on a PC
3. You can tidy the programs using Basilisk or HFV Explorer.
The fastest work is with two floppy disks - one is read by PC, second one is in
Mac.
What to do if You have Mac with 400/800K disk?
It's impossible for PC or today's (Mac OS X) Mac to handle this type of disk.
More, if you put this disk to this Mac, it may be DESTROYED!
If you can't link two Macs with cable to transfer files, you have to use another Mac, capable to read both 400/800K disk and 1.4MB disks
(almost all Macs with internal 1.4M floppy drives) to transfer files:
1. To transfer system disk and compression program from 1.4MB floppy to 800K
floppy.
2. To transfer compressed programs from 800K disk to 1.4MB disk.

Well... this picture is far from perfection, but it shows what I'm writing here
:).
You can make and restore an orignal disks images by using Apple Disk Copy
program. This one works only on Macs, and you can use it for example, to create
400/800K system disk in 1.4MB Mac. Just transfer Disk Copy and system image to
the mac using 1.4MB floppies.
Remember that you must cover the hole opposite to write protection hole to make
Mac think floppy is 400/800K. But don't erase them in 1.4MB Mac, try better to
do it in 800K (and again, and again, demagnetize, and again...) - as it has weaker writing head, erasing in 1.4MB Mac may lead to
more errors than in normal executing of this procedure. And don't store software
only on these, as these "re-made" 800K disks are unstable (it's possible to make
them more stable by total demagnetization using, for example, tape player head
demagnetizer, and then re-formatting them in 800K drive).
7. What hard drive should I use?
Most of early Macs use SCSI drives. Their internal connectors are standard 50-pin ribbon cable connectors, external ones are conventional DB25 SCSI, so external cases with proper cables may be used without problem.
If your non-Apple SCSI drive is not visible in Apple HD tool,
it's usually not problem with SCSI but the drive is not genuine Apple one.
There's patched HD tool which solves this problem and detects all drives (on
this bootable disk to boot Mac and format!,
RaWrite will help you making floppy). You can
also patch it yourself (see
this article).
Remember that SCSI should be terminated on the last device or with physical
terminator device.
Now an important thing about these patched tools: In some Macs some tools work, but the same ones won't work in another. Probably nothing useful works in System under 7.1, so boot Network Access Disk and work form there. It's not possible to fit all these tools on Network Access Disk, so having no access to another Mac you may have to eject it and swap. Among other, there are 3 tools: 7.5.3 SC Patched, which may detect, but not write to problematic drive, Drive Setup 1.5, which should work, and HD SC Set-up 3.1 A/UX for more stubborn drives. This tool is made for making different drives compatible with Apple's revision of Unix, and is quite buggy, and it takes AWFULLY long to complete initialization. Format, initialize, verify, make partition, format it, verify it - it takes lots of time. It should be used to make single-partition disks as its driver (the code loaded to the "base" of disk) may not work well with other.
Newer Macs use standard IDE (PATA) drives without problems. Some Power Mac G3 and earlier G4s may have problems with drives larger than 137GB.
8. How to make System install floppies?
Floppies are usually distributed in binary format, which is executable on Macs. You have to emulate a complete Mac, install OS on it and then extract SMI.BIN to floppies.
To emulate Mac using Basilisk software read here. Now having installation version of MacOs on basilisk's HDD, reconfigure it to Your PC's floppy drive. You have to format all floppy disks in virtual Mac and copy all files from SMI's floppy to empty floppy disk. Note that you can build only 1.4MB floppies this way. Physical 800K floppies are not supported in Basilisk emulator and require another physical Mac with Mac OS SMIs on its HDD.
To make boot floppies bootable you have to put System file to system folder on floppy. If it's already there, just move it out and in back again. Strange? Not - if you copy a whole System folder to floppy, it won't be bootable. If Mac OS detect moving System to System Folder, it'll mark this disk as bootable.
Other disk images can be in format used by other software, e.g. Apple Disk Copy distributed in some Mac OS versions around 7 or separately.
9. How to install OS?
Yo have to: 0. Boot Mac Os from floppy, 1. Format HDD, 2. Install OS.
To boot safely you can use boot disk supplied with Mac OS, but with 7.5 version there are 2 disks for 2 types of computers. Just try. If you have problems with booting from OS installation flopies, use Network Access disk.
Now prepare for floppy swapping. more than 30 swaps will be made.
To format disk, use Apple HD SC Setup available on Mac OS installation floppies. It's quite simple. If Setup program doesn't see the disk, use a modified HD SC Set-up described in e.g. part 6 of this document.
If you plan to use patched HD Setup, eject boot disk and place patched HD SC disk in drive. Swap. Swap. Swap. Try to open newly appeared SC disk. Lots of swaps. Run it. Swap boot disk - patched disk more. Now you can partition... with a few disk swaps.
The same way is to install OS after successful partitioning/formatting drive.
Don't think that you'll just copy System folder from bootdisk to HDD and avoid lots of disk swapping. If you copy System folder from floppy to formatted HDD, you'll get a message at bootup that this OS is only for booting from floppy... Even if you install another one.
After OS installation (I prefer using default settings because they're optimized for model), reboot and install updates needed.
10. CD-ROM Macs - CD booting.
To boot from CD-ROM place the bootable CD in drive and reboot Mac. During bootup try to hold c key. It should boot. Installing from CD is easier as floppy swapping is not required. Unfortunately not all Mac Os systems are in CDs.
Some Macs were distributed with CD containing system tailored to them, these are called "Restore CDs". Avoid using Restore CDs with Macs other than these for which the CD is, because different drivers may slow the system down.
Some rare Macs will boot from floppy or hard disk if there is one, but will boot from CD only if there's no HDD to boot even if C is pressed. In such cases you must use Startup Disk applet in Control Panels to force next CD boot. Remember that to install system you need a decent CD rom drive with a nice reading capability, some drives reading CDs slowly but successfully will not boot.
11. Macintosh video ports
Early Macs have built-in displays. Later models used 15-pin connector, which in fact is electrically very similar to VGA. More, it contains 3 wires for type configuration which automatically configures resolution and refresh rast on Mac.
To view this pinout of Mac see here. There are manufactured MAC-VGA converters equipped with DIP switches allowing to specify resolution on Mac.
Early Power Macs have an unfortunate HDI-45 connector which has the same signals as 15-pin Apple connector, but also sound and some other expansions. It is possible to buy a converter or connect the following pins to VGA: R,G,B, Ground (any), HSync, VSync. Three Monitor Sense (NOT Monitor ID!) pins are as in all 15-pin Apple connectors. The biggest problem is a connector which is virtually unaccessible and it's hard to obtain such pin spacing. It can be temporarily done using goldpin connectors and hot melt glue, but it's a temporary solution.
12. OpenFirmware Mac USB boot (installing Mac OS X from USB stick).
You have to prepare Macintosh bootable media. You must make (or download, copy, borrow, steal, etc :) ) a Mac OS installation DMG using Mac OS' Disk Utility, and restore it to flash drive. This will make USB drive bootable in Mac. It may take some time (at least with OS 10.4 and Power Mac MDD) to restore image to USB thumb drive.
But first, format your USB flash drive in Disk Utility: Select it, then go to "Partition" panel, remove all partitions and create one. Click "Options" and select "Apple Partition table"... Not GUID or Boot record. Name it as your disk image's partition. Then restore disk image to this partition. This is an important step or drive will not boot. If you've restored image to FAT, you'll get errors like "load size is too small" or "partition is not valid..."... and variety of partition errors.
The thing is that it's a USB stick, not a CD disc and if you boot it as from USB, most Mac OS X installers will fail - they'll think that CD has been removed from drive between installer initialization and first installer window. You have to trick the Mac to take USB drive literally as optical drive. USB bridge will understand it and system can be installed.
1. Insert USB stick
2. Press Command-Option-O-F and turn Mac on. Release when you see the prompt.
3. Type:
dev / ls
you'll get a list of all devices. You have to note which device is your USB stick. It can be described like /usb@1b/disk1, or something similar. Type:
devalias
to get its path in computer device's tree, for example: /pci@f2000000/usb@1b/disk@1 - note it down! This is the trace which leads to our USB stick through computer's chipset and controller devices.
Now you can boot from USB, but as I written, MacOS installer will fail. You have to cheat Mac to think USB is CD. Type (use previously noted path):
devalias cd /pci@f2000000/usb@1b/disk@1
This will make Mac think that it's reading CD, but it'll refer to USB!. Now even most of cracked versions of Mac OS (for example betas with timebombs removed) will run from USB. So let's boot it:
boot cd:,\\:tbxi
13. Connecting two Macs with cable
Because of serial port used, you can't connect a classic Mac to iMac or newer computer, as it has no serial port. But you can, for example, transfer files from Mac with damaged (or 800K) floppy disk drive to Mac with 1.4M floppy drive.
Let's start with cable. Here's the pinout of my cable, checked with continuity tester. I don't know are all these pins used, I checked it and works, more, this cable works well as a loopback cable for diagnosing old Macs with MacTest. In fact, it's printer cable for Personal LaserWriter 320, it works with it well too. The cable has two Male 8-pin mini DIN plugs.
|
|
|
| Plug 1 | Plug 2 |
| 1 | 2 |
| 2 | 1 |
| 3 | 5 |
| 4 | 4 |
| 5 | 3 |
| 6 | 8 |
| 7 | 7 |
| 8 | 6 |

As you see, its pinout is quite simple. All middle pins are connected 1:1, and all pins on edges are swapped.
Serial connection is a typical client-server connection. One Mac must have System 7.x or later software allowing to set up a server. Another Mac must be capable of booting System 6 or must have >=System 7 too to act as client.
If your client Mac can boot System 7, I think you can use System 7 Network Access Disk, although I never used it in this purpose. If you prefer to link Client from System 6, you have to get this package. It's a 1.44MB floppy image (do it with PC + RaWrite) containing another Floppy imaging software and 800K floppy image. You have to extract the software to hard drive of any Mac with 1.4MB floppy drive, then copy the disk image and make the 800K boot floppy (remember to cover the hole opposite to write protection one). This disk supplies the most basic System 6 environment to use serial link as a client. You can boot most "compact" Macs from it. Newer computers should be booted from System 7 Network Access Disk.
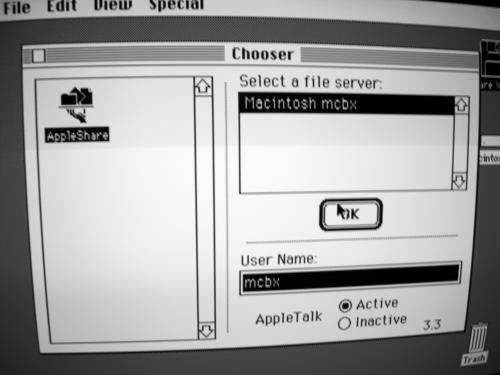
Connect both Macs with the cable, then turn them on. Check if client has Chooser instelled. If yes, click it, then look for AppleShare in the list. If there's one, you don't need any bootable floppies. If there isn't, boot machine from Network Access or 800K System 6 Client floppy disk and check again.
In the server, launch Chooser and click ACTIVE on AppleTalk. Verify that cable is connected. It may be needed to reboot the server. Check is it the same in client. It must be ACTIVE in both machines.
Now sorry for Polish screenshots, explaination will be in English :). They are from System 7.5.3 upgraded to 7.5.5. I think in other versions it's similar.
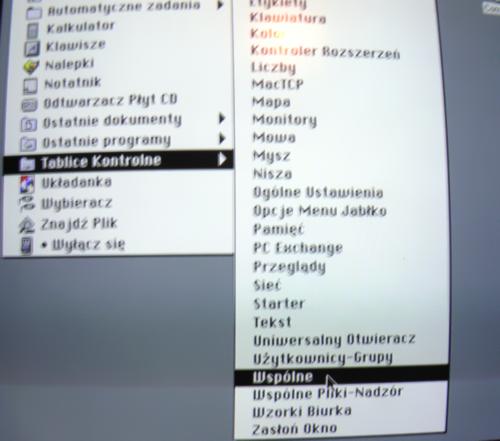
In the server, do this: Apple Menu->Control Panels->Sharing Setup.
Enter user name and computer name, you can enter password or leave it blank (you will be warned, but it's not much possible that someone will hack your system thru serial port :) ). Click Start in "Shared files".

Wait for the end of launching subroutine. As it launches a true server, with file indexing and virtual drives, it may take a minute. Now the disk is shared through the serial port.
Go to client computer, Apple Menu->Chooser. Select AppleShare, enter User Name - the same as in the Server, select this Server, click OK. You will be asked for password and there will be a window with auto-mounting (selecting volmues with "X" in box) - DON'T SELECT IT. If you select it, it'll try to automount the drive every boot making it painfully long if no cable will be connected.
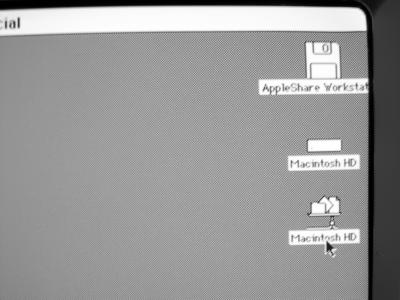
If you completed this procedure, you should have this on your Client's screen:
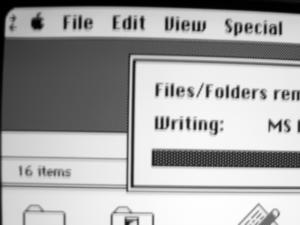
By clicking it, you are about to access remote drive, and now you can copy data to/from it. If you still can't, check the server: Users&Groups, File Sharing, Access Privileges (some systems). During file transfer you will see an icon with two arrows in Client's menu bar:
Good luck with transfers. Do not transfer thousands of files, better compress them with programs supplied here to separate directories (for example applications). This makes you able to easily check if the transfer went OK (successful extraction means successful transfer).
14. Resetting root/administrator password in Mac OS X 10.5
We will use Single mode. This is a service mode in which you get
root without password if you have physical access to machine's console, it is
present in all Unix-like operating systems and is used if it's impossible to log
in (e.g. disk damaged enough to fail reading of accounts files). Press
Apple-S (Command-S) and turn the computer on, OS will boot for a few seconds
and you'll land in a root prompt on black screen. Press Return a few times to
get it blank of kernel messages.
Now mount the main drive:
mount -uw /
Activate indexes and directories (not FS directories! e.g. user's credentials
directoreis!) management:
launchctl load
/System/Library/LaunchDaemons/com.apple.DirectoryServices.plist
Change password in password directory (replace MACMINI with your admin user name
and 1234 with password):
dscl . -passwd /Users/MACMINI 1234
Reboot by announcing:
reboot
At first boot-up, OS should ask for password.
Remember that it's a shell prompt, so you can always use tab key for
auto-completion.
15. Any useful links?
Important:
According to Apple it's legal to download an old Mac OS (up to 7.5.5 as I
know) ONLY if you have an original Mac, as these were distributed with OS.
Apple "info.apple.com"
information
As of 2015 Apple said "F..k you" and disabled access to older software. However,
there is an
archived
copy which allows to be browsed and data can be taken from there.
[As URLs change, local copy of Memtest for Mac OS X is here. Unzip it and run the package, it places Memtest binary to /usr/bin. To maximize tested memory you should boot to single mode (Apple-S during boot-up) and then use memtest all command to test memory in loop.]
GaugePRO - this small freeware displays CPU speed, temperature and briefly tests memory in Mac OS 9 Macs.
-
http://web.archive.org/web/20111116111040/http://www.macfaq.za.pl:80/ - Low
End Macintosh FAQ.
-
http://support.apple.com/kb/TA47341?viewlocale=en_US - What Mac OS on what
Mac - but don't rely on this, as memory requirements of, for example, 7.5.3, are
sometimes making 7.1 a better choice.
-
https://archive.org/details/download.info.apple.com.2012.11 -
Here you can get a Mac OS system and updates. In Polish there's 7.0.1 with
update to 7.5.
-
http://web.archive.org/web/20040604193729/http://www.konta.plo.pl/marcinek2/mac/systemPL/
- Another Mac OS in Polish resources. Links should work.
-
http://web.archive.org/web/20010616101209/http://members.home.net/moonglue/pluszip/index.html
- Installing ZIP drive as hard drive in diskless Mac computers. Local copy of
driver is here. Never tried.
-
http://web.archive.org/web/20010506095348/http://www.macmad.com/cdroms.html
- How to use all CD-ROMs in Mac with early drivers. The tool for hacking Mac OS
installation is mirrored locally.
-
http://web.archive.org/web/20020205034345/http://www.mindspring.com/~a.d.king/400K/
- Mac 128/512K floppy click of death fix. No photos survived, but it may be
identified what to do.
Not much useful links:
-
http://web.archive.org/web/20070103053928/http://www.apple.com.pl/support/polskie_dodatki/starsze_systemy/
- Here Mac OS 6.07, 7.1 and 7.5.3 in Polish were distributed for all people
having old Mac. As they deleted it, I asked Apple by e-mail about it. Now they
just say "F**ck you and buy a new computer, but don't redistribute these antique
copies, as it's illegal!". Summing up: ordinary swindlers, illegal too.