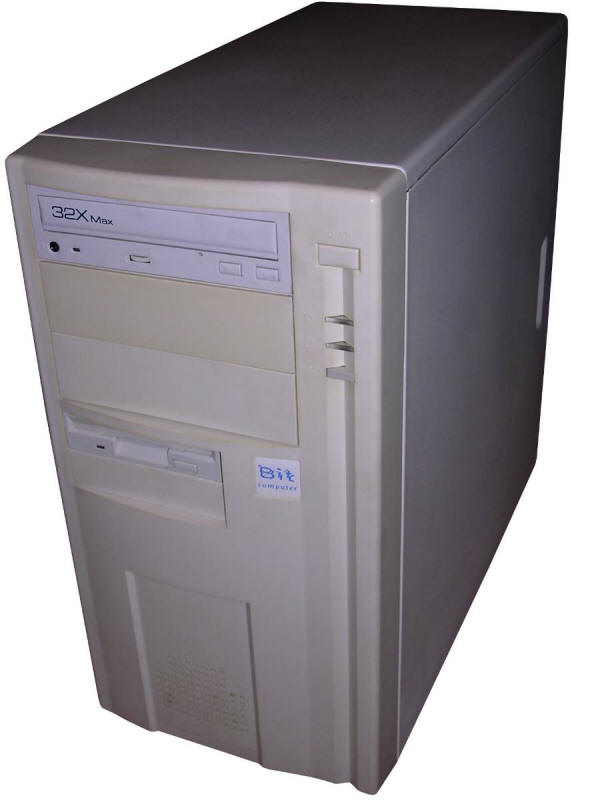
Celeron 566MHz ATX Tower
This time not an Intel, not AMD but Cyrix, or VIA.
This is a computer from 2000 with Cyrix CPU. These CPUs were low-cost,
low-power and despite their high frequency (this one is a Cyrix M3 with
550MHz clock) they had poor performance. This Cyrix is comparable to
300-400MHz Celeron.
These CPUs were bought because their frequency looks good in
advertisements. In fact they were not so common and although most VIA
chipset based mainboards support them, it is not widely marked in most
manuals.
The machine has a typical configuration for these times: 128MB of RAM, a
2x AGP graphics card and 8GB hard disk of popular Seagate Medalist
series. Additionally there is a network card and, what is not so
typical, a video capture board, a bit older than PC.
| Approx. year | 2000 | |
| Class | ATX | |
| CPU | VIA/Cyrix MIII | |
| Speed | 550MHz | |
| RAM | 128MB PC-100 DIMM modules |
|
| ROM | Award BIOS | |
| Mainboard | ECS P6BAP-A+ Rev. 2.1 | |
| Graphics | S3 Trio3D/2X AGP | |
| Sound | Onboard CMI8738 | |
| Ports I/O | Onboard. 2xCOM, 1xLPT, 2x USB, PS/2, gameport, 2 IDE channels, Floppy drive |
|
| Network | 3Com 3C509B PCI, 100mbit |
|
| System expansion bus | 4x PCI slot 2x ISA slot 1x AGP slot |
|
| Floppy/removable media drives | 1x 3.5" 1.44MB floppy
disk drive
|
|
| Hard disks/ATA devices: |
Seagate ST38422, 8GB IDE 32x CD-ROM drive |
|
|
Peripherals in collection: |
||
| Other boards:
|
miroVideo DC1 ISA video capture board. | |
| Casing | ATX tower | |
| Non-standard expansions: | None | |
| Operating system(s): | Windows 98SE |
| Contents: | Starting, usage | Drivers |
Starting
The mainboard is very "smart", it detects most problems
and informs the user. It is possible to change front side bus frequency
to overclock CPU, but RAM goes upward with it.
The settings for RAM like "Normal, Fast, Turbo, SDRAM 8ns, SDRAM 10ns"
seem to have no effect on preformance.
Video capture board (miro Video DC1) and how to install it
The video capture board, MiroVIDEO DC1, is an older one
with a MJPEG encoder. Video coming from it has no high resolution, but
sufficient for occasional ripping VHS. It requires a special istallation
in Windows 98.
First, install the OS and the system. Now install the board and check
does the computer start with it. In the system, it won't be detected as
it's not fully plug-and-play compliant (this board has been introuced in
1994 and was in market until 1990s). Go to Control Panel, then to Add
New Hardware wizard and then instead of scanning for new hardware select
the option to choose hardware from list.
Select "Sound, video and game controllers", go next and "Have disk..."
selecting driver directory. Here, install the driver. The driver
installer on floppy is for Win3.x only.
Now the most important part: The system will show you 3 settings, IRQ,
DMA and address, write them down to paper. Windows will shut down to let
you install the board but you previously did it.
Turn the computer on and enter BIOS Setup. Go to PNP/PCI Configuration
and set the following options:
- "PNP OS Installed" to "Yes"
- "Resources Controlled by" to "Manual". You will get lots of IRQ/DMA
options below.
Now change the IRQ and DMA you written down to "Legacy ISA" leaving all
other ones to "PCI ISA/PnP".
Now you can use VidCap or FlyCap to capture video without "Bad IRQ"
error. Overlay will not work anyway. About overlay connector, I still
don't know how to connect it.
That's how the disk looks like
Manual and drivers for mainboard are still (2017) offered by manufacturer.
|
|
S3 Trio3D/2X drivers for Windows 9x and NT4 |
|
|
miroVideo DC1 driver and FlyCap program |


