![]()
![]()
![]()
![]()
![]()
![]()
![]()
![]()
![]()


All my content and ptohos

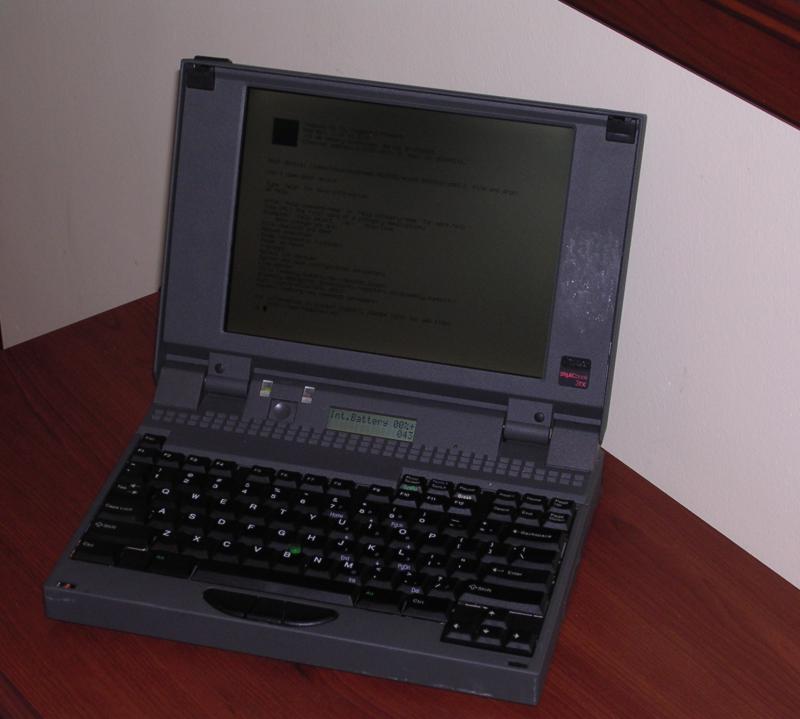
Tadpole Sparcbook 3TX
Tadpole was a company from UK which made software,
network solutions and hardware for it. In 1990s, cooperating with Sun,
they started to implement Sun's SPARC technology to notebooks. Many of
them were industrial-grade rugged computers with magnesium casings and
high-quality components.
SPARCBook 3TX was a third generation SPARCBook portable computer which
could run Sun's Solaris up to v. 2.6 (2.7 - but with less support). It was in fact Sun's
architecture computer
assembled as portable unit. Earlier third-generation notebook, 3GX, had
110MHz CPU, 3TX used 170MHz.
The biggest problems of this computer were big heat dissipated by CPU
right to the bottom surface and short battery running time. And of course its price was much higher than typical
Intel-based notebook.
| Manufacturer | Tadpole |
|
| Origin | UK | |
| Year of unit | 1997? 98? | |
| Year of introduction | 1997? 98? | |
| Type | Laptop, PC | |
| CPU | TurboSPARC, 170MHz | |
| RAM | Up to 128MB with pair of 2 72-pin SIMM modules. | |
| Floppy Disk | None | |
| Hard Disk | 1.2GB SCSI 2.5" | |
| Other media | None, external SCSI connector to connect any SCSI device. | |
| Graphics and display: | Weitek graphics, 800x600x256 colors LCD TFT display | |
| Sound: | 16-bit Sun-compatible sound chip | |
| Keyboard and pointing device: | Small PC keyboard, 84-key,
Trackpoint-like device with 3 buttons. |
|
| OS: | Solaris up to 2.6 with Tadpole's GUI extesions. | |
|
|
||
|
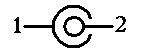
Power supply:
1 - Ground |
||
| I/O: | - VGA DB15 - Sun's (?) AUI-like for network (x2) - SCSI - small 50-pin connector - Sun-compatible keyboard/mouse port - Sun-compatible serial ports. - Speaker in/out/headphone jacks - ISDN and analog modem - 2x PCMCIA |
|
| Possible upgrades: | Memory (two 72-pin SIMMs, VERY picky about memory, pair must be matched) | |
| Additional peripherals: | None |
Unfortunately I don't have a hard disk for it - I have a drawer but without ribbon cable needed for drive to work. I also don't have special external SCSI CD-ROM drive to boot it from external SCSI and install Solaris to external SCSI HDD. It's in poor condition, it has been thrown few times before I got it so casing is scratched and right lock is broken. All my information will be theoretical, but docs supplied should help you to set up the unit.
You think about Linux? Theoretically possible, but as FAQs state, there are no ways to make this thing display console - only X. If you want text mode console, you have to go through serial port and external terminal. And if you have only 128MB RAM you won't find it useful in GUI.
OS Insallation: First, it's not only Solaris. You need Solaris, Tadpole drivers, Patches and optionally Tadpole GUI notebook extensions called NCE (Notebook Computer Extensions). You should use Solaris 2.6 CD 3/98 and 5/98 as they have Tadpole drivers included. Patches were available on Tadpole's FTP server but they're now gone. GUI notebook extensions were supplied only with notebook's OS CD.
To boot SPARCBook from SCSI CD-ROM drive, the drive, as in most RISC systems, must have 512bytes/sector mode enabled. Notice that most PC drives read 2048 bytes per sector, so they won't boot.
When you boot SPARCBook without disk, it goes to firmware.
You can almost always turn notebook off by pressing Pause/Break + O. When no
volume to boot is present, it should land in firmware prompt (otherwise
accessible with Pause/Break + A). Help system is quite self-explainatory
there as you write "help" command.
In operating system, Pause/Break+O turns the system into Save mode,
read: suspend-to-disk (known today as hibernation).
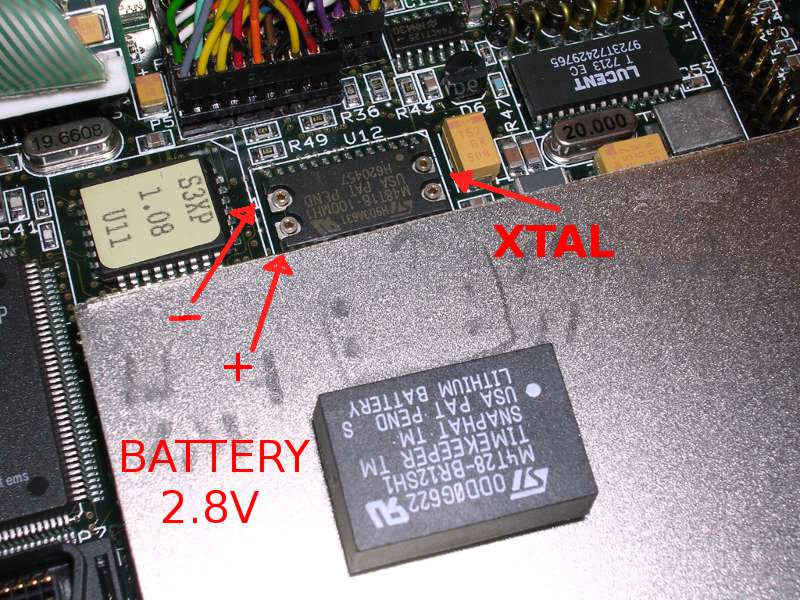
I almost forgot. Now about batteries. If you don't know
what Dallas-type RTC is (for Dallas DS1287 - the most popular chip with
this technology), it's an RTC chip with battery sealed-in. If battery
runs out, you have to replace a whole chip or drill some holes in it to
put wires for external battery. Sparcbook has such a chip for RTC and
BIOS settings (called NVRAM in this architecture). These settings define
not only RTC, but some important hardware parameters. By default, main
battery is used to keep this memory alive, after it's removed/discharged
built-in cell is making settings non-volatile.
The chip consists of 2 segments: One, soldered to PCB, is a chip, it has
4 gold connectors for upper part - which is sealed container with
lithium 2.8V cell and quartz crystal. To replace battery, it may be
needed to file down part of upper segment, then solder wires right to
chip's battery terminals. Upper part must be plugged in as it contains
quartz crystal (Xtal). 2.8V battery is needed. Detailed description of
this chip and its pinout is detailed below. Here' a photo of this chip:
Disassembly is not as hard as they describe in FAQ:
1. Remove battery, RAM, HDD, PCMCIA cards.
2. Remove 3 screws from the bottom (under stand and one under rubber
pad)
3. Carefully and slowly open the notebook, lift LCD part upwards, place it horizontally
away from the laptop, do not disconnect cables. Close removed LCD part
now.
4. Remove one screw from keyboard. Carefully remove keyboard part by
opening it towards you, then sliding out. It may be placed on LCD part.
5. Remove 3 screws on the PCB.
6. Carefully pry open two CPU connectors, one near RAM, one near HDD
bay.
7. Now pry the last pin connector (top-right), remove CPU board. Do not
touch place where heatsink touches casing, do not touch plastic layer on
a heatsink too.
8. RTC/NVR is a chip near the top of PCMCIA bay, you can remove its
battery/XTAL top, install wires some way and use 2.8V battery here. XTAL
part must be still connected. If you do it, you'll loose NVR settings
and you have to reconfigure it back in prompt as it boots from network by
default.
9. Battery terminals are in the LEFT side of chip, away from PCMCIA,
negative pole closer to connectors (rear) part - shorted with ground
(you can check with ohmmeter).
10. During re-assembly remember to place CPU firmly and do not shut LCD
cables by microphone (they go to the left of mic), all screws are needed. Ah, be careful about rubber
part on the edge, rear cover (you can place it in only when
disassembled, so do it before fastening 3 bottom screws) and lid closing
switch (left lid lock hole). There are some photsos of dis/reassembly in
the gallery.
Here you can read a complete FAQ about third-generation SPARCBook.
Now documentation, it was on Tadpole FTP server before it went off.