![]()
![]()
![]()
![]()
![]()
![]()
![]()
![]()
![]()


All my content and ptohos

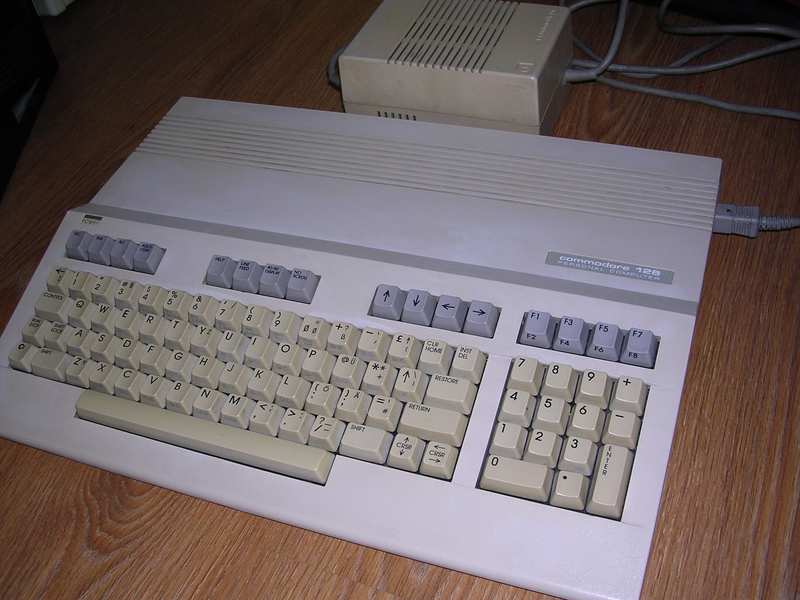
Commodore 128 (C128)
Not much popular in Poland, not because of limited
access, but price, few times higher than Commodore 64. The last
Commodore's 8-bit computer was a complex machine with 2 CPUs, allowing
to run Commodore software and CP/M with Kaypro-compatible programs.
However, CP/M mode, using Z80 CPU, was painfully slow, comparable to
Robotron 1715, but with serial 1571 FDD disk operations were even slower.
80-column text mode was needed to run CP/M properly, but it doesn't look
good on a typical monitor or TV (using SCART - composite was
incompatible).
C128 was nearly 100% compatible with Commodore 64. To get it, a "64 Mode"
was implemented, which forced compatibility with 64. One of ergonomy
flaws there was leaving arrow keys inactive, forcing user to try with
shit-arrow combinations.
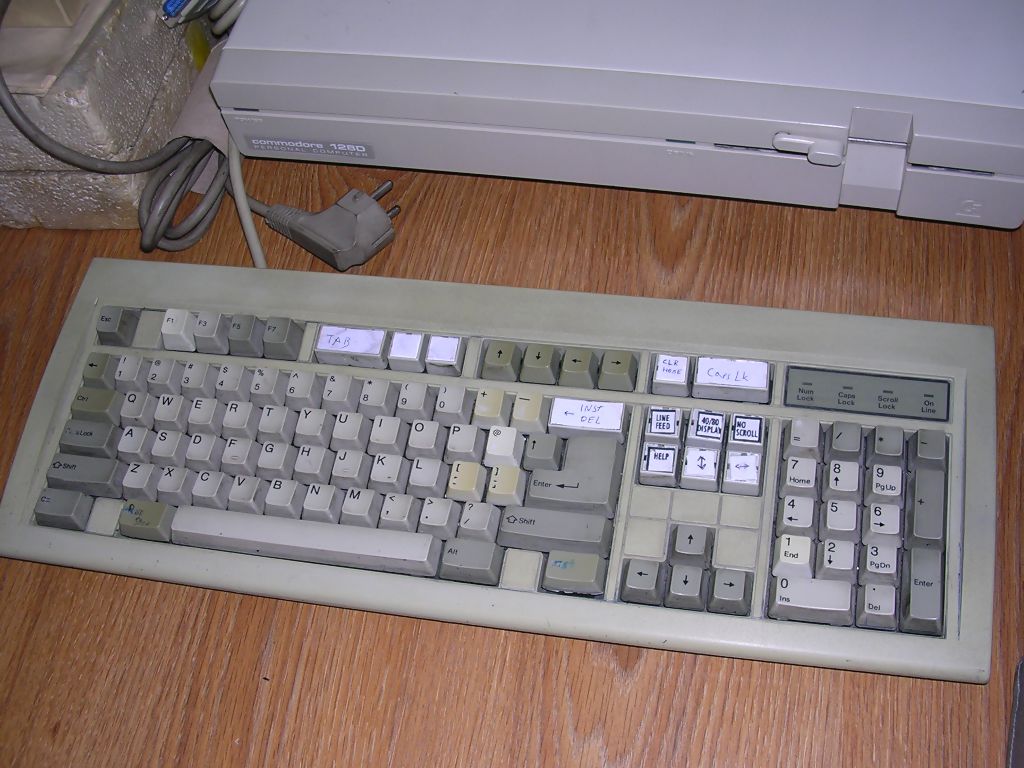
There were two models of C128 - Commodore 128 shown here and C128D (or
D-CR cost-reduced), which had larger video RAM, integrated
power supply and floppy disk drive.
| Manufacturer | Commodore Business Machines |
|
| Origin | U.S.A | |
| Year of unit | 1987 | |
| Year of introduction | 1985 | |
| End of production | 1989 | |
| CPU | MOS 8502 + Zilog Z80 | |
| Speed | 1/2MHz (8502), 2.5MHz (Z80) | |
| RAM | 128kB, 16kB VRAM | |
| ROM | 48kB (Basic) | |
| Colors: | 16 | |
| Sound: | 3-voice SID chip | |
| OS: | C128 Basic, C64 Basic, CP/M | |
| Display modes: | Text: 40/80x25 Graphics: many, best 320x200 and 640x200. |
|
|
|
||
|
|
||
| Media: |
Tape recorder External 5.25" floppy disk drive Cartridge slot |
|
|
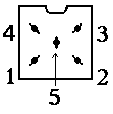
Power supply: |
||
|
5-pin DIN square Female: 1 - +5V DC, 2.5A |
||
| I/O: | Tape Cartridge port User Port Serial port RF modulator RGB video Monitor connector (composite) 2x Joystick ports |
|
| Possible upgrades: | A few (VRAM, ROM, ports etc.) | |
|
DO NOT USE AMIGA
POWER SUPPLY (or vice versa)!! |
||
| Software accessibility: | Easy (TOSEC, dedicated sites) | Accessories in collection (dedicated for C128): |
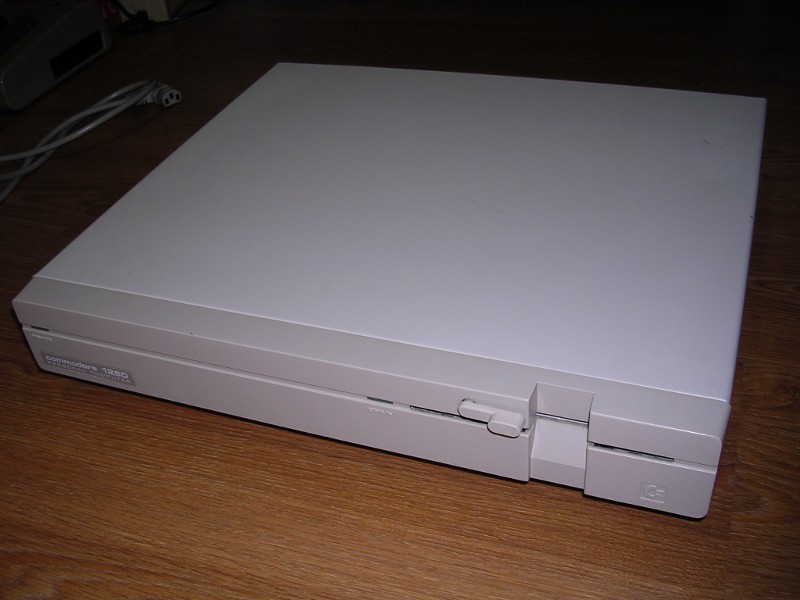
Commodore 128D (C128DCR)
In 1987 Commodore decided to refresh Commodore 128 design and sell it cheaper. Classic C128 had two mainboards: Computer and floppy disk drive. C128 came with one, with floppy drive built in a desktop casing with central processing unit. Keyboard is external, so looking from outside everything looks like an office computer or even early Mac. Its casing was made of plastic and had keyboard dock to place detachable keyboard near computer. It had also a carrying handle. Commodore 128DCR was cost-reduced version - it had simple metal casing with plastic front panel and no keyboard dock. It was also manufactured without some internal connectors.
| Manufacturer | Commodore Business Machines |
|
| Origin | U.S.A | |
| Year of unit | 1987 | |
| Year of introduction | 1987 | |
| End of production | 1989 | |
| CPU | MOS 8502 + Zilog Z80 | |
| Speed | 1/2MHz (8502), 2.5MHz (Z80) | |
| RAM | 128kB, 16kB VRAM | |
| ROM | 48kB (Basic), FDD ROM | |
| Colors: | 16 | |
| Sound: | 3-voice SID chip | |
| OS: | C128 Basic, C64 Basic, CP/M | |
| Display modes: | Text: 40/80x25 Graphics: many, best 320x200 and 640x200. |
|
|
|
||
|
|
||
| Media: |
Tape recorder Internal 5.25" floppy disk drive Cartridge slot |
|
|
Power supply: |
||
|
Built-in linear power supply giving +5V DC, +12V DC and 9V AC. |
||
| I/O: | Tape Cartridge port User Port Serial port RF modulator RGB video Monitor connector (composite) 2x Joystick ports |
|
| Possible upgrades: | A few (VRAM, ROM, ports etc.) | |
| Software accessibility: | Easy (TOSEC, dedicated sites) |
The Commodore 128 is a semi-professional computer of its
time, it has 2MHz 6510-compatible MOS processor and Z80 to support CP/M.
In C64 compatibility mode 6510 was underclocked to ~1MHz to get proper
timings. Both in C128 Basic (7.0) and C64 mode Z80 was turned off (except
the very beginning when computer had to decide which mode to run). In CP/M
mode both processors were working, with 8502 doing some low-level system
functions. System gave control to 8502 after storing needed parameters
in specific locations. Next, 8502 executed system command storing
results in memory, and then Z80 regained control.
In graphics modes, there are 2 major text ones: 40-column and new
80-column mode, allowing C128 to run CP/M properly and use higher
resolution graphics. However this mode usually needed special monitor.
If you have this monitor, 128 is a great GEOS machine. The only problem is that to run GEOS you need a good mouse too.
My unit comes from Germany, has German keyboard and German character/keyboard ROM. In this software, Caps Lock key became a switch between ASCII and DIN - international and German character sets. However, as some users may try to list BASIC programs which throw CAPS LOCK on and off, here are commands to enable and disable this key:
poke0,peek(0)or64:poke1,peek(1)and191 //German DIN font or Caps
Lock ON
poke0,peek(0)and191:poke1,peek(1)or64 //Standard C128 font or
Caps Lock OFF
(grabbed from some forum)
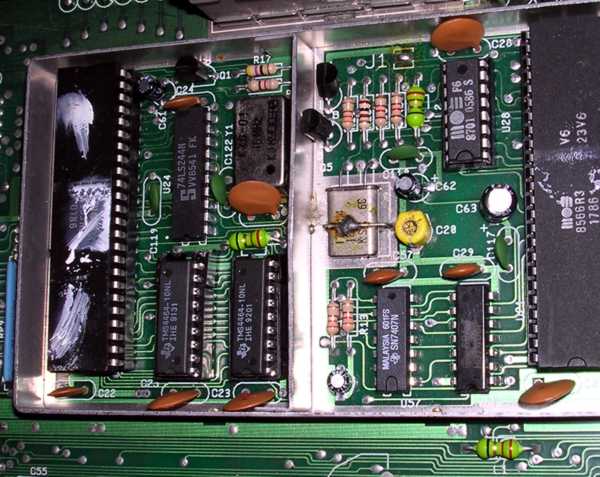
The mainboard of C128 has some blank places which may lead us to conclusion that Commodore engineers planned something slightly different than C128. There's an internal power connector (CN12), a button SW2 and diode, being maybe a part of some additional reset circuit. There's also additional ROM socket - to extend software. It is used to add os expansions, for example GEOS (see archived page or my fileland).
Commodore 128 has, in its software, remains of Commodore LCD, never produced prototype of portable 8-bit microcomputer. There are two directives, OFF and QUIT, giving "?UNIMPLEMENTED COMMAND ERROR". These commands were probably created to maintain LCD's mobile features: turn OFF interface during sensitive data execution and QUIT from BASIC interpreter to "upper" ROM operative.
Another "Easter egg" comes when you type SYS 32800,123,45,6 - see gallery for details.
| Contents: | Starting | Floppies | Video expansion | Video pinout | C128D keyboard | Links |
Starting:
Boots to Commodore 128 BASIC by default.
If Commodore key is pressed during power-up - boots to C64 mode. Looks
like C64.
If a CP/M bootable disk is present in drive - loads CP/M.
If a 40/80 column key is pressed, it runs in 80 column
mode. If you see only blank square, you don't have an appropriate
display. If you have TV with SCART connector, you may try to make
SCART-RGB cable by connecting R, G, B lines of C128 to appropriate lines
on SCART connector, CSync output to 20 pin of SCART, and 5V to 16-pin of
SCART thru 4.7 KOhm (or other 1-5K) resistor. Putting 5V directly may
damage SCART input in TV.
If you have more old computers, try these old PC displays with 9-pin
plugs. Many CGA monitors will work in 80-column mode, but sync must be
tuned - in PC settings the picture will scroll itself.
Loading and saving programs is quite the same as in C64, except CP/M. C128 uses CP/M 3.0, also known as CP/M Plus, which is a complex OS, so it'll run slowly on 2MHz-effective Z80. The brief command manual is in files section, and disks are in Zimmer's FTP.
Floppies:
Things are more or less the same as in C64, with except
in CP/M disks - these are poorly visible in StarCommander.
1571 is a 2-side drive, and 1541 writes on 1 side only. However 1571
uses 1-side mode by default. To read/write 2-sided disks you need
2-sided drive.
So one thing: Do not mess with CP/M disks in StarCommander.
To make your first CP/M bootdisk from image, just copy the disk using "Copy Disk" function in StarCommander. These disks are one-sided called "flippy", so if there's something on 2nd side, it's accessible after flipping disk. It meams that you can use even slow 1541 to record it, but I haven't tested this config, even using the same drive.
HERE you have a nice tutorial how to copy CP/M disks to floppies without modifying CP/M disks with Sta. Not tested, but probably it'll work.
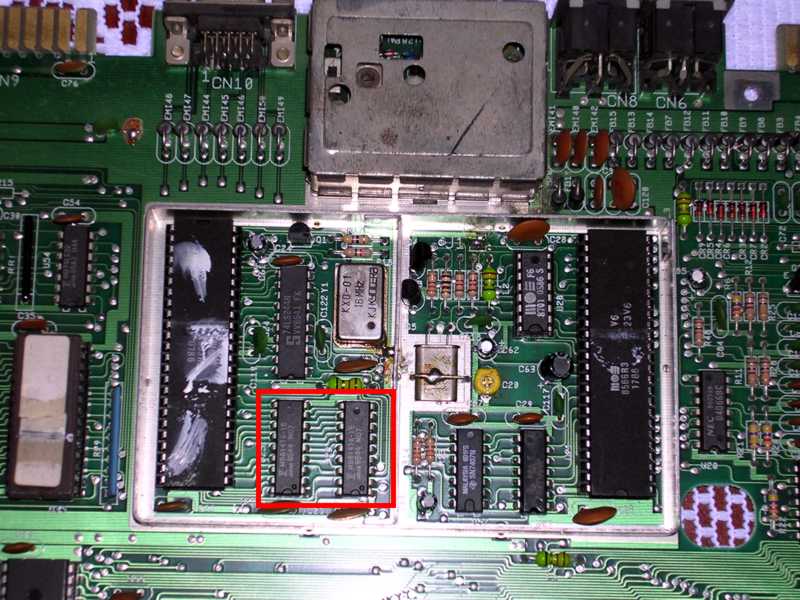
Video RAM expansion (C128 only - not C128D/CR, it already has it)
This is simple in explaination, but complicated when you
do this.
1. Disassemble C128 by removing 6 screws from bottom (one is in the
middle)
2. Remove RF shield by removing more screws, maybe unlocking bent
latches
3. Now you'll see one more RF shield, smaller can in the upper-left part
of mainboard. Remove the cover.
4. You'll see two 4 bit x 16K chips, labeled 1416 or something like that.
5. You need to replace them with sockets, and put 4bit x 64K chips into
them, test it and assemble it back.
6. Ah, Power LED connector comes with red wire to upper part of
mainboard (rear of computer).
Unfortunately, it's quite hard to unsolder these chips.
Cutting legs doesn't work too, because there's no space to firmly stick
a knife.
Moreover, pins are bent, so even if you unsolder it, you'll end with
pins still soldered to sides of holes.
I desoldered mine with a big solder sucker made of old fridge compressor,
fuel filter and old-style metal ball pen case. First, I put a drop of
solder on every pin to make it bigger. Next, I heated a pin until solder
melted, pushed it against bend, and when I felt that it's near the center
of hole, fired the pump. It was working, but I had to patch 3 broken
tracks.
It's probably impossible to do it without solder sucker and good
soldering iron. With hot air - possible.
Here are photos with these circuits:
Video:
8-pin DIN female socket:

| 1 - Luminance out 2 - Ground 3 - Audio out 4 - Composite video out 5 - Audio in 6,7 - not connected 8 - Chrominance out. |
And RGBI DB9 Female connector:

| 1,2 - Ground 3 - Red 4 - Green 5 - Blue 6 - Intensity 7 - Monochrome output (3 shades of gray) 8 - Horizontal sync 9 - Vertical sync |
C128D keyboard:
I can give you some hints if you plan to build a keyboard from scratch, it should be possible as it's only key matrix (and in fact I'm doing it).
- A page from service manual
with keyboard schematic. Pin 4 is +5V, pin 1 is ground.
- If you don't have a bistable switches for Shift Lock, Caps Lock and
40/80 cols mode, it could be possible to build a latch from, for example,
CD4013 circuit and power it from these +5V.
- Old PC keyboards can be used as parts source, especially key switches.
You can use keycaps too, but to customize captions you should use
keycaps with printed characters, not injected in plastic - printed
figures are easier to remove or customize with soft sandpaper.
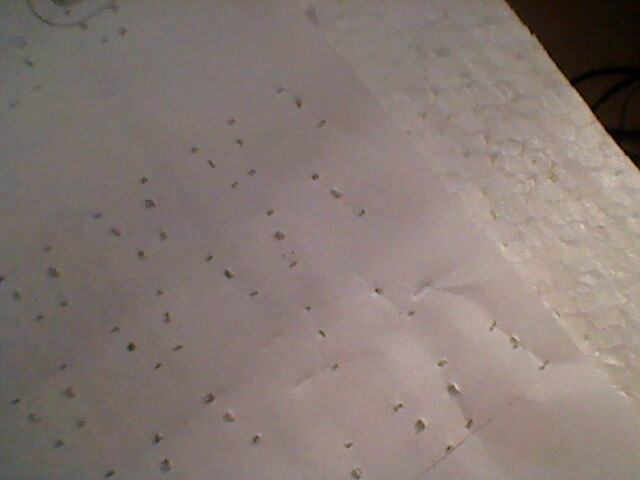
Here are some photos from construction (poor quality photos taken with cell phone):
 |
 |
 |
|
Keys are placed in styrofoam through paper |
Resulting paper form, after line paralellness correcting is used to drill holes in board |
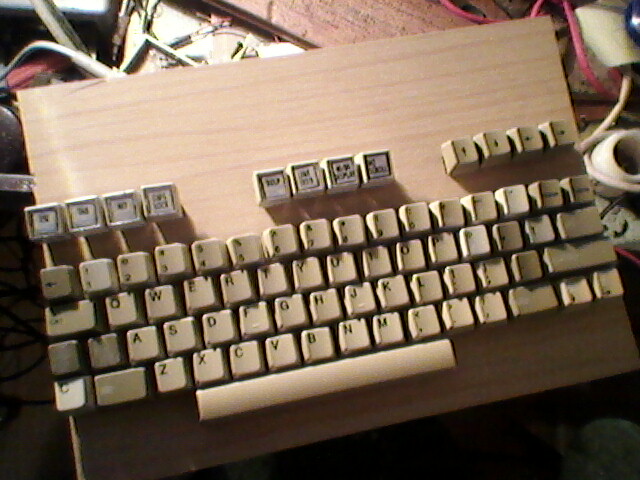
Keys installed in board
|
 |
 |
 |
|
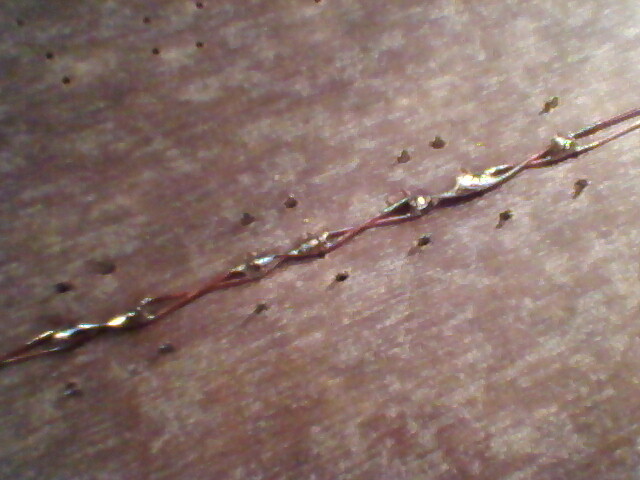
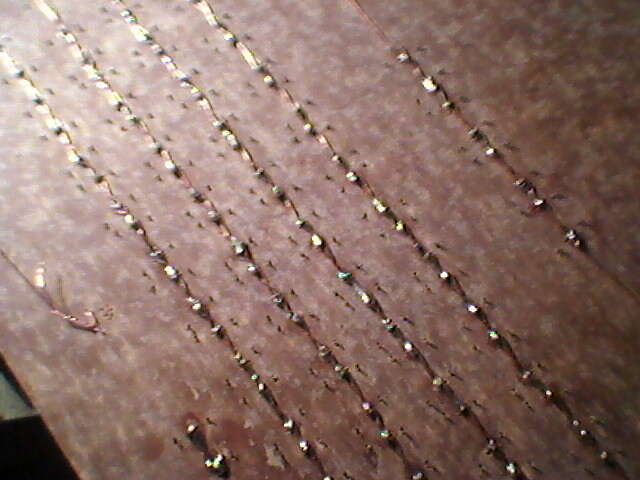
Keys mounting with wire from old network cable |
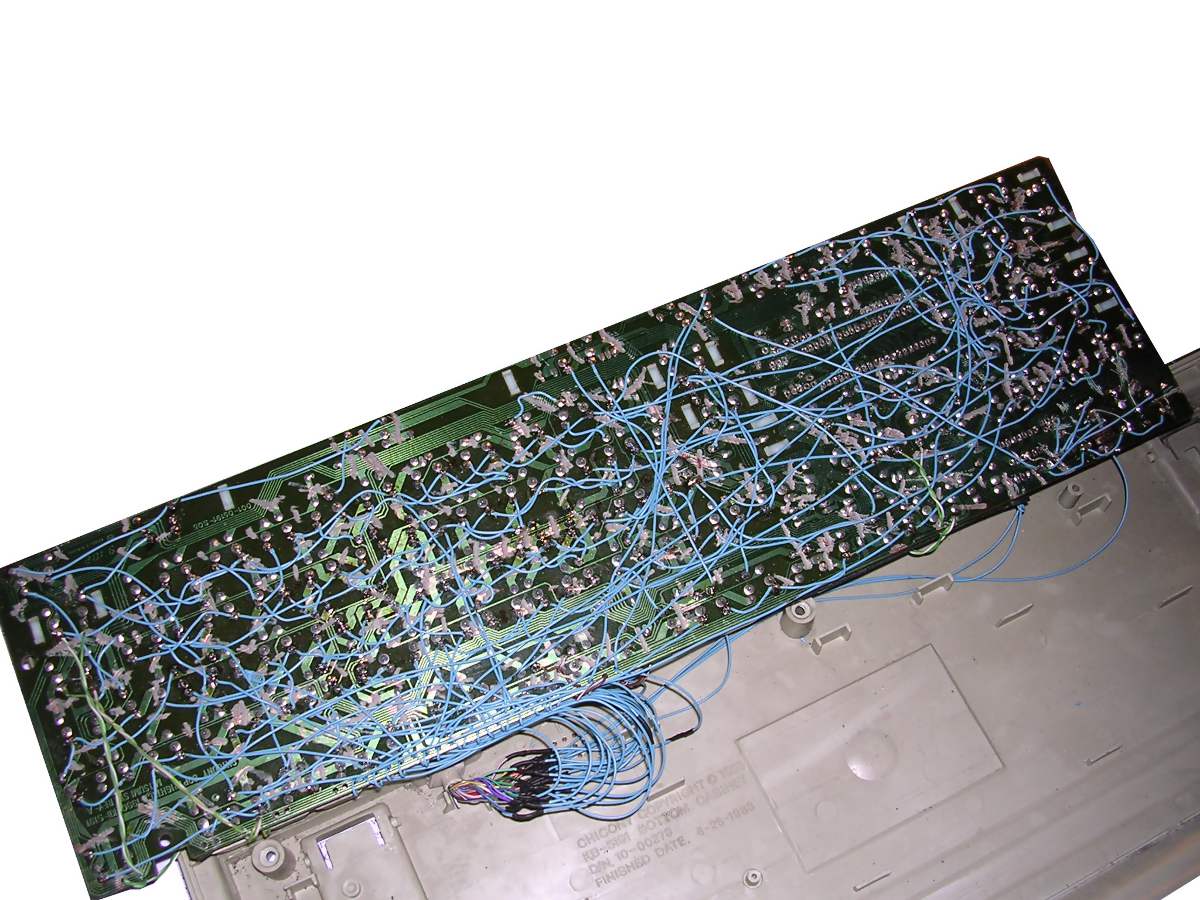
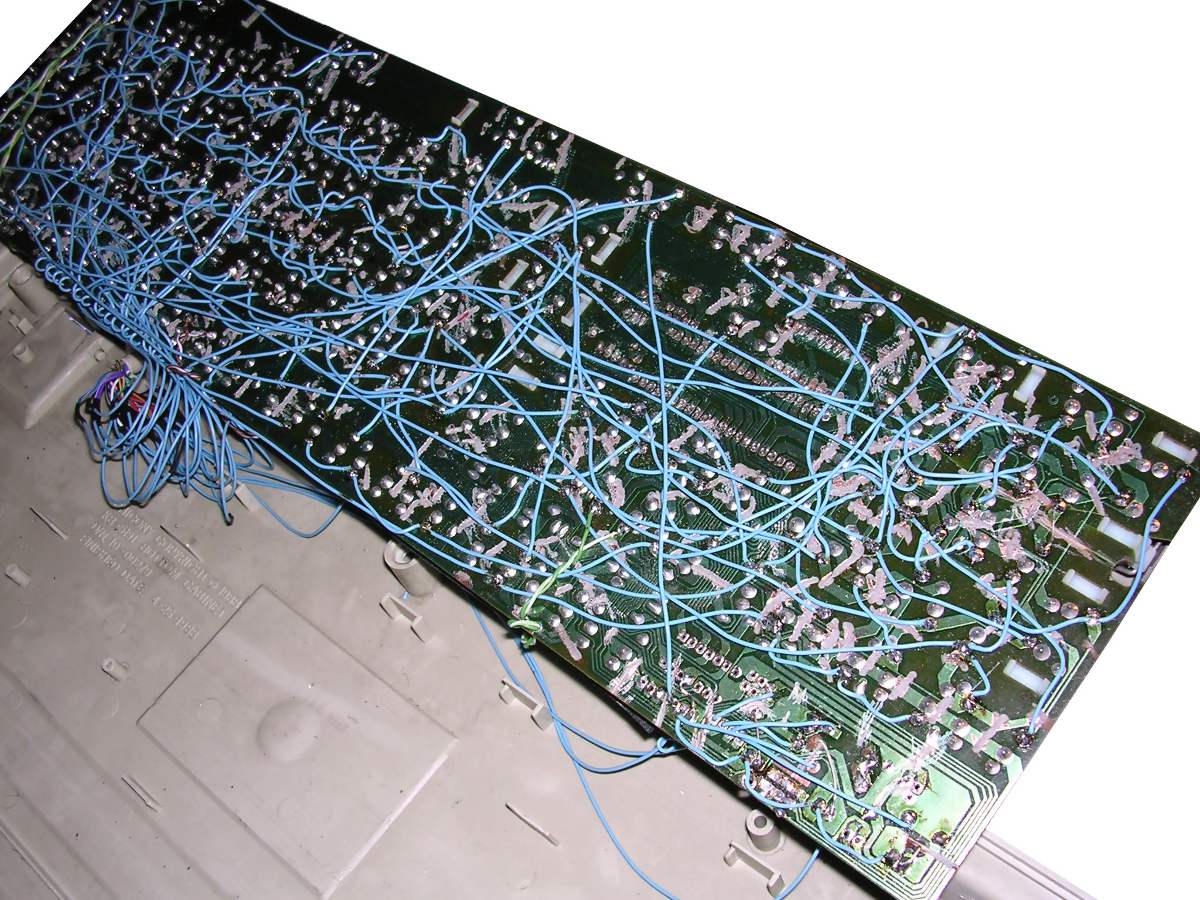
Wiring runs | |
Now it should be needed only to connect keys with cables, secure resulting "jungle" and deal with bistable keys.
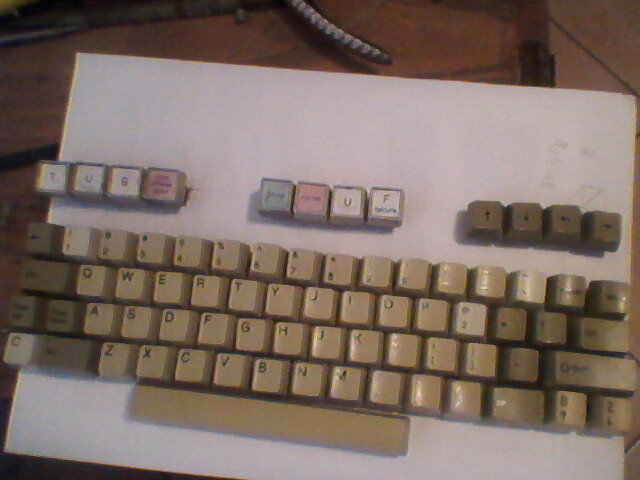
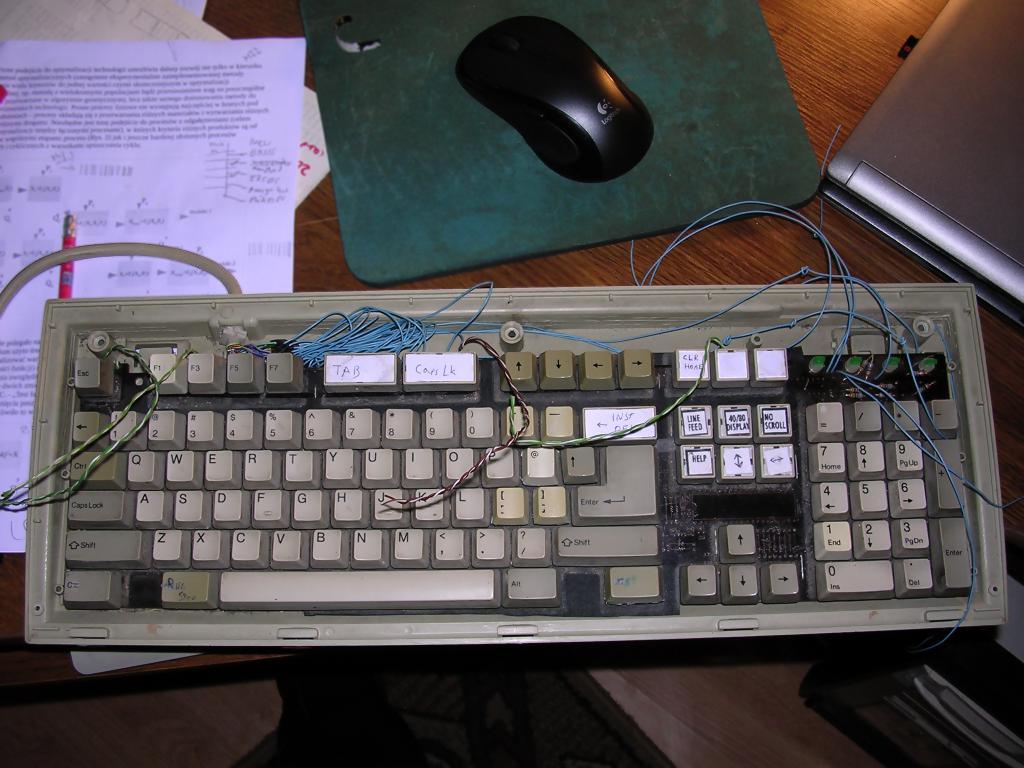
Finally after discovering that some switches are damaged, I decided to convert an old broken PC mechanical keyboard to C128 one. The keyboard had 4 damaged switches, so I replaced them with ones from my first attempt. Next, I've cut all tracks connecting keys and re-created matrix with wires. It was the most time-consuming process. I've tried to use logical switches and LEDs for 40/80, Caps and Shift Lock, but in my C128 5V supplied in pin 4 was so weak that it couldn't power all LEDs. So I've used a small bistable push buttons, as in Turbo switches in old PC cases, to switch 40/80, Caps and Shift Lock. I've installed these switches near main switches, used then to mechanically support key. It's working quite well. If you are looking for a good cable, look for printer cables. There are some parallel pinter cables with easily accessible inside of connectors. Most have pins 18-25 shorted to one wire, they won't be good, but some other cables have all 25 pins of DB25 connector conneced to 25 separate wires - these are good and can be used in keyboard.
Here are some photos:
 |
 |
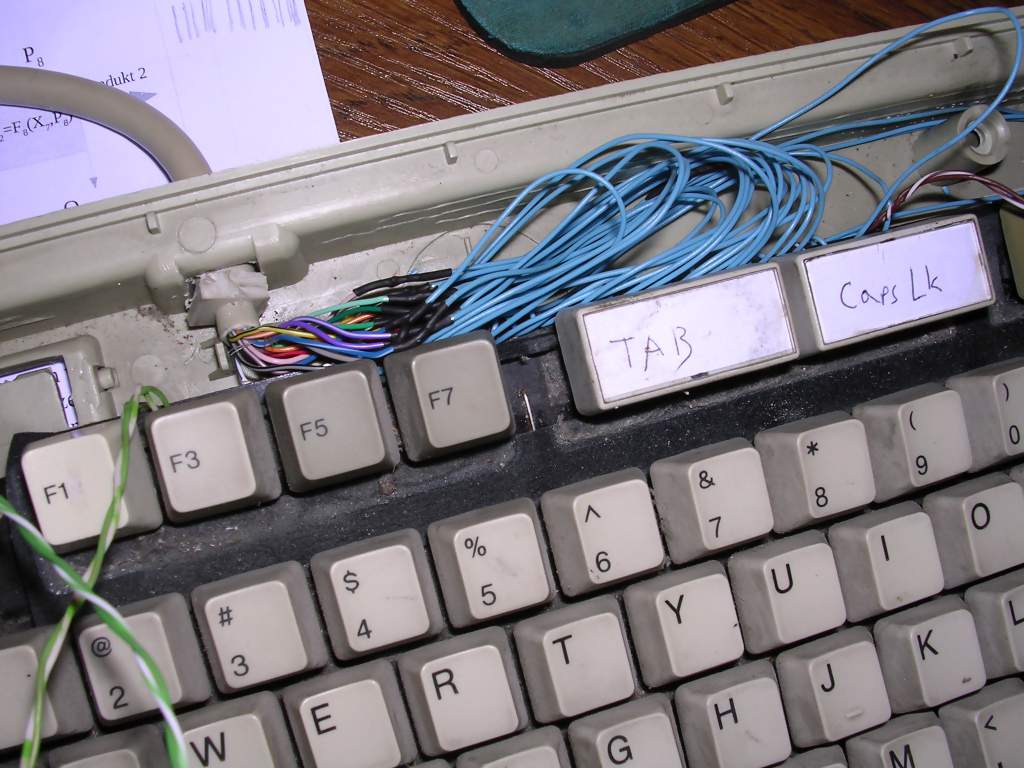 |
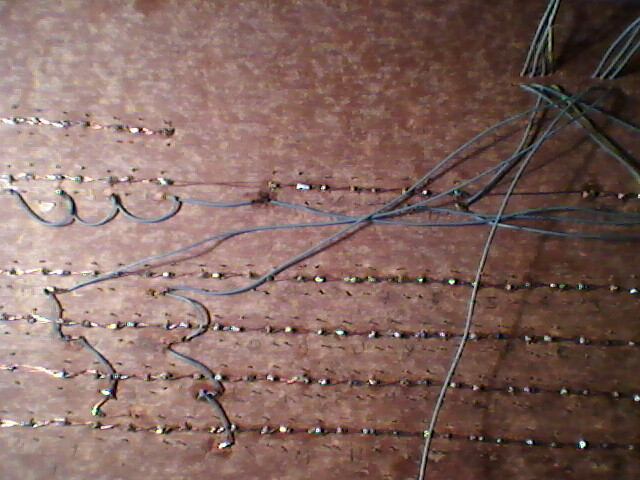
| Matrix | Detail | Wwres connected |
 |
 |
|
| Keybord front | Testing |
http://personalpages.tds.net/~rcarlsen/cbm/c128/RGB V-RAM/64kvram.txt -
Upgrading VRAM to 64K
http://www.cpm.z80.de/drilib.html - CP/M books library
http://www.zimmers.net/anonftp/pub/cpm/sys/c128/system/index.html
- CP/M for C128, to get actuial system disks use
http://www.zimmers.net/anonftp/pub/cbm/demodisks/c128/
http://web.archive.org/web/20090414153025/http://members.elysium.pl/ytm/html/projects.html
- many projects to C128 and C64.
http://rvbelzen.tripod.com/
- although downloads are not working, some interesting hardware hacks
are there.
http://www.cpm.z80.de/manuals/cpm3-usr.pdf - Digital Research
CP/M 3 Guide
http://www.commodore128.net/
- C128 and other Commodores forum Update 2018: GONE.
http://archive.org/details/Commodore128128DServiceManual1987Nov -
Commodore 128 service manual