![]()
![]()
![]()
![]()
![]()
![]()
![]()
![]()
![]()


All my content and ptohos

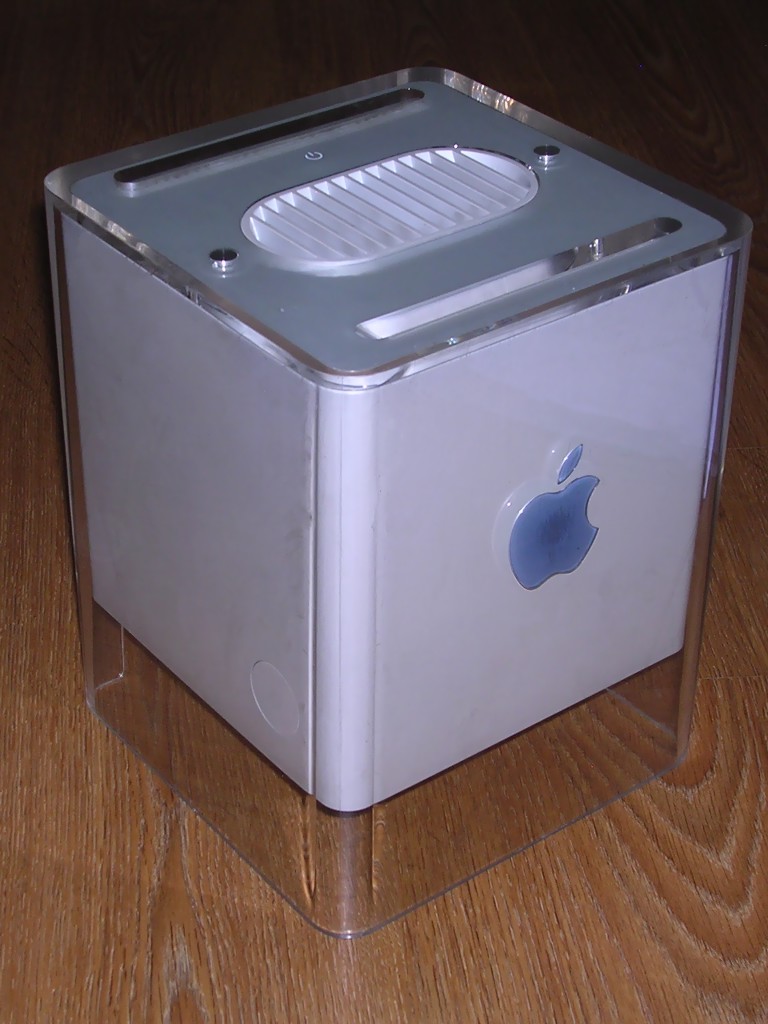
Power Macintosh G4 Cube
Power Macintosh G4 Cube was a new design in Macintosh computers. It gave a G4 performance for compact dimensions and smaller expandability (no PCI or sound card). It was shipped with 450 or 500MHz G4 processor, 64MB (later 128MB) of RAM and 20GB hard disk (later changed to 30GB). It has 3 RAM slots, AirPort card slot and CD-RW or DVD drive. The high-end version had 60GB hard drive and 256MB of RAM, but even in its cheaper versions it was too expansive for offered enhancements.
| Model No: | M7886 |
|
| Year: | 2000 | |
| Discontinued: | 2001 | |
| CPU: | PowerPC G4 450MHz | |
| RAM: | 256MB | |
| Max. RAM: | 1,5GB | |
| RAM Type: | 3 PC100 DIMMs | |
| Hard disk: | 20GB IDE, 3.5" SL | |
| Floppy drives: | None | |
| Other drives: | Slot-loading 24x CD-RW (DVD in some models, on order) | |
| Graphics: | AGP (AGP 2x - ATI Rage 128 Pro, Radeon or GeForce 2 MX) | |
| Sound: | Stereo, USB-based output (external sound chip) | |
| Display: | Depends on graphics card installed (default: VGA or ADC) | |
| Dedicated OS: | Mac System 9 |
|
| Maximum OS: | Mac OS X 10.4 |
|
| Expansions: | USB, FireWire | |
|
Power supply connector:
28V DC at 8.5A - may work on lower voltage (such as 24V/5A) but it won't be stable, HDD will spin down and optical drive won't work. |
||
| Connectors: | - 2 USB
connectors - 2 FireWire connectors - Telephone connector (modem) - Ethernet connector. Power switch is a touch sensor on the top. Reset and interrupt switches are on the bottom. |
|

I have no idea where my unit was used. I got it from internet auction. It is in a good shape, but I have no speakers nor power supply, so I had to use 24V one - OS was installed from USB stick, as CD-ROM doesn't work with 24V.
Here you'll find:
| Upgrading memory | Disassembly | Links |
Memory upgrade
Simple. Remove Cube from its transparent "container", you'll find RAM near graphics card. Most 133MHz modules work well.
Disassembly procedure.
Cube is a compact construction, yet it's easier to disassemble and reassemble than, for example, 800MHz eMac with ATI Graphics.
Removing Cube from plastic container:
1. Turn it upside down. You can see a rectangular piece of metal in the
center with a small hole. Push it and carefully pull then. It should
come off forming a handle and unlocking computer. Pull the computer (called
"Core" by Apple) out of the plastic case using this handle.
During re-assembly remember to correctly position the "Core" so
connectors side meet cut-out in enclosure.
The touch sensor has sharp edges, and these should be kept clear. Don't destroy them as you won't be able to turn Cube on.
Removing hard drive
1. Find AirPort connector. It is located on a small piece of metal. This
piece is a door which can be opened by pressing latch near Cube's edge.
Open it.
2. Here you'll see two connectors: a flat ribbon and power Molex
connector. Disconnect them.
3. Push the handle back in.
4. Place the cube like it is in the case - power switch up, placing it
on connectors. Look to the top and find 3 screws: 2 on heatsink (opposite
to power switch) and one over it. Loose them, but don't remove.
5. Now you can lift the heatsink a few milimeters and slide the drive
out.
Removing graphics card:
1. Remove 2 screws keeping front of video card to the chassis.
2. Remove Torx screw keeping back of graphics card to the rest of
computer (if applied).
3. Lift the video riser card, remove card from riser. Put the riser back,
check are cables still connected
Links:
-
http://www.cubeowner.com/overclock.html - Overclocking procedure
- http://www.cubeowner.com - Cube
FAQ, forums, information.
-
http://support.apple.com/kb/TA26059 - G4 Cube Troubleshooting - POST
light codes, CUDA reset etc.