![]()
![]()
![]()
![]()
![]()
![]()
![]()
![]()
![]()


All my content and ptohos

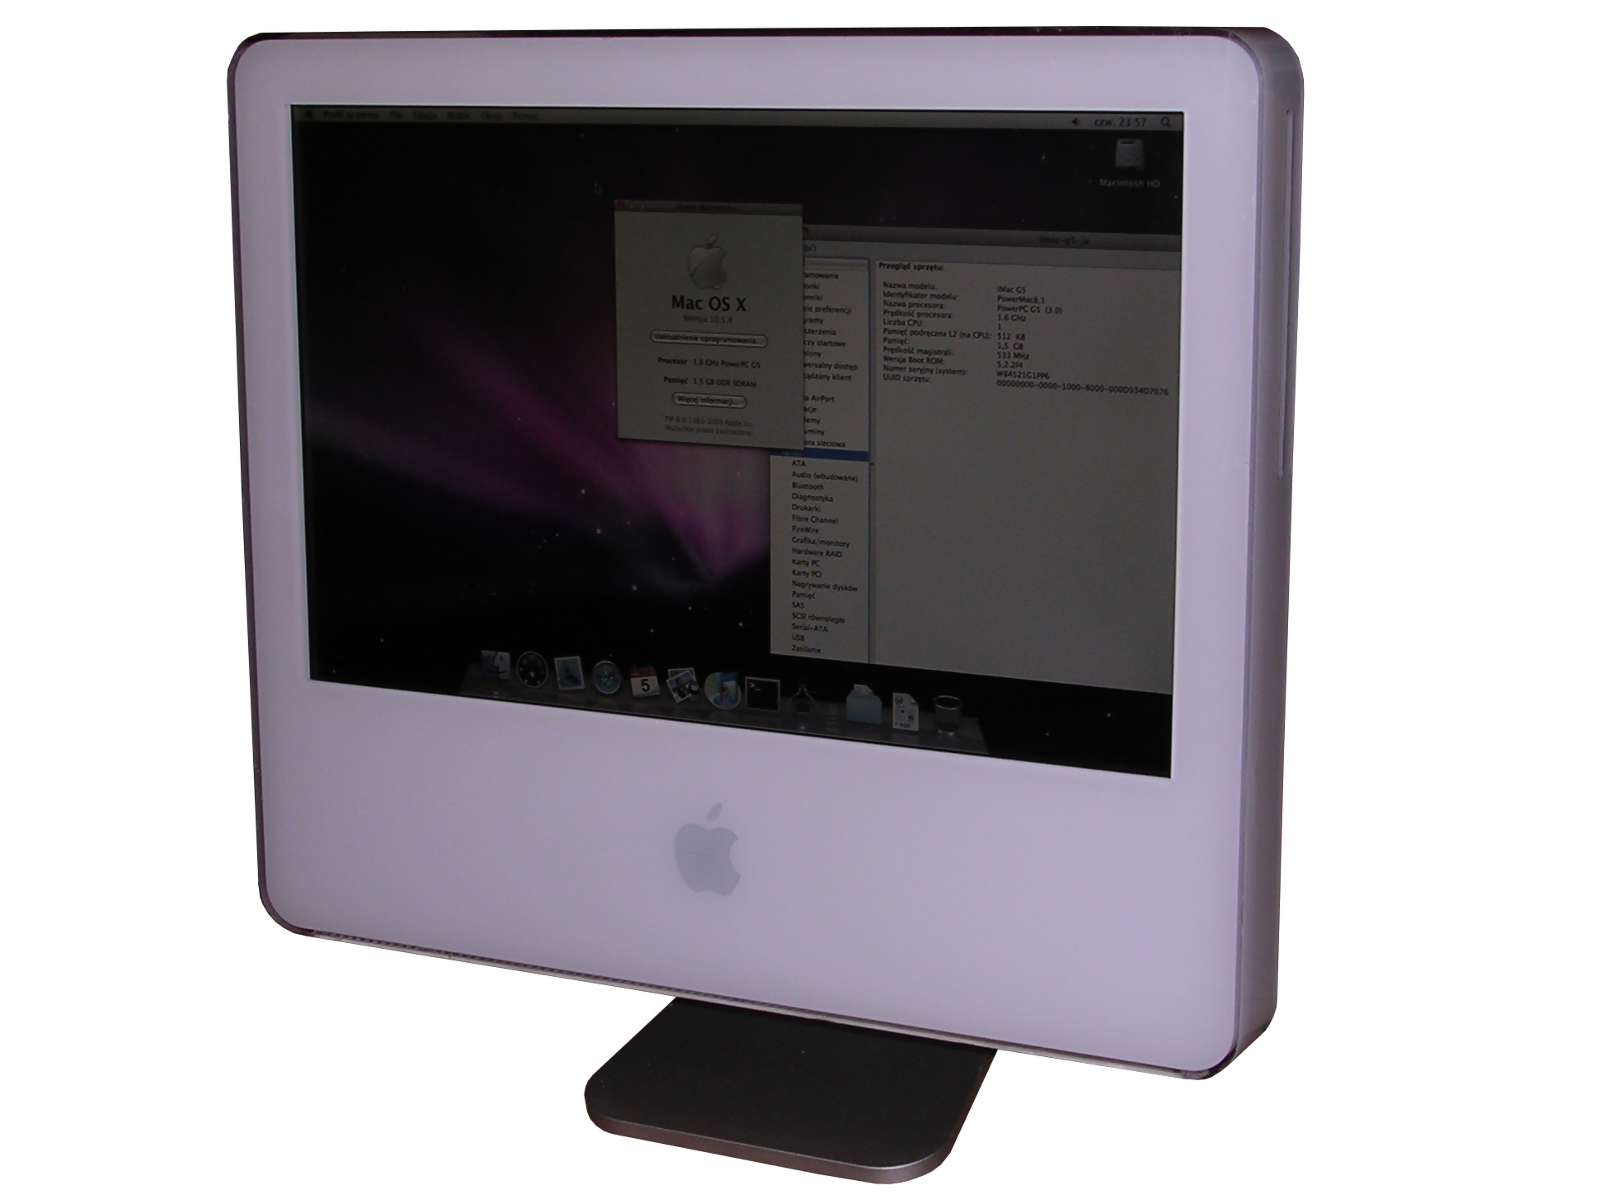
iMac G5
In 2002 Apple introduced iMac G4 - the first iMac with
LCD panel and with a novelty design. However, this design became source
of many problems: LCD mounted in one point tended to fail, conductor
cable could not survive twisting and servicing CPU was difficult. 2
years later, after developing a whole line of better and better "desk
lamp" G4 iMacs, Apple released iMac G5 as a totally re-designed
computer.
iMac G5 was another wonder of miniaturization - a whole computer fit
into about 5cm-thick display unit on alluminium stand. The first model
was released with 1.6GHz PowerPC 970 (G5) CPU and 17-inch display, but
later models were 20-inch and had even more powerful CPUs. Many new
technologies have been used in this iMac: DDR memory (earlier present
only in Power Macs), advanced, system-dependent cooling and SATA hard
disk was used too. A typical 3.5-inch hard drive could be fit inside.
PowerPC G5 are really hot processors, so hot that high-end Power Macs
had liquid cooling systems. They tend to heat up under load, so to put
anything more than 1.6GHz CPU Apple engineers had to design a cooling
solution. They did it by installation of 3 turbine-like fans inside -
two suck the air from inside casing and push it into a slot present on
the rear. Cold air flows into computer from the bottom freely, except
CPU block which has a third fan blowing right to heatsink's fins.
Unfortunately such compaction of components made CPU cooling part almost
unserviceable without removing a whole mainboard and the computer still
operates on the edge of overheating. But from the user's perspective, if
not under load, iMac G5 is usually silent. Under heavy load is starts to
make noise.
Development of iMac G5 line included adding an iSight web camera and
light sensor to make picture well in all conditions. The maximum CPU
used was a single 2.1GHz one, as with this cooling solution it was just
impossible to fit anything better to it. In 2006 they were replaced by
Intel-based Macs.
| Model No: | A1058 |
|
| Year: | 2004 | |
| Discontinued: | 2005 | |
| CPU: | PowerPC G5 1.6GHz | |
| RAM: | 1.5GB 1GB+512MB in two DDR sticks |
|
| Max. RAM: | 2GB | |
| RAM Type: | DDR 400MHz (PC3200) | |
| Hard disk: | 80GB SATA | |
| Floppy drives: | None | |
| Other drives: | CD-RW/DVD drive, slot-loading. | |
| Graphics: | Built-in GeForce4 MX maximum: 1024x768? |
|
| Sound: | Stereo, built-in speakers | |
| Display: | Built-in 17" LCD | |
| Dedicated OS: | Mac OS X 10.3 | |
| Maximum OS: | Mac OS X 10.5.8 | |
| Expansions: |
- Memory by DDR DIMM - USB - FireWire - AirPort card - Bluetooth board |
|
|
|
||
|
Peripherals in collection: |
||
| Connectors: | - USB (3 ports) - FireWire (2 ports) - Ethernet - Phone - Power - Speakers/Mic - Display? |
|
My unit was bought from a company who had it probably from import (Germany? After-leasing machines?). During its life its capacitors failed and someone replaced them. Later, hard disk has been replaced. Unfortunately Polish Post damaged the package (as they explained: because warning stickers were not in proper size). A few of plastic parts of rear cover have been broken and had to be glued back. Cyanoacrylic glue known as "Super glue" is enough to make the casing in one piece, but few layers have to be applied.
| Hardware | Disassembly |
Hardware
First about overclocking. Theoretically it may be
possible to overclock G5, but I haven't got any sources about it. More,
G5 are very hot processors and with so small space for cooling it won't
give good results.
There are two links - first, a
webpage of a man who tried to build a G5, when he cites asnother
forum user (look for BadAndy) that modifying of frequencies is
impossible without messing with firmware.
The
second site is a theoretical AND ONLY THEORETICAL (please don't do
it to your Mac!) site about overclocking a Power Mac G5. This is
probably only half-valid, because we still have microcode problems to
solve.
So it won't be easy to overclock an iMac G5 to get e.g. 1.66GHz from
1.6GHz :).
Next, capacitors.
Many G5 iMacs suffer from capacitor problems - they bulge and fail
making computer unstable first, then preventing it to boot. Sometimes
machine with damaged capacitors may beep and spin fans at the maximum
speed, but this may also be a symptom of other problems. If capacitor
inspection shows that theit cans are not flat - mainboard has to be
removed and capacitors replaced.
So, the hard disk drive temperature.
Another technical issue is the hard disk temperature sensor. The small
board with usually TMP75 chip, connected to the side of hard disk and to
the connector under DDR slots. If you don't have one (this part is
sometimes dropped in HDD upgrade), avoid using a high-speed hot 7200rpm
disk. Generally 7200 WDs don't heat up too much, but Seagates do. It
WILL overheat. See
this for information, they all had problem with overheating Macs.
And the servicing.
The button closer to the fan is an internal power button. Because
cooling without case in place is rather poor, it should be used in
diagnostics only.
The button below it is a SMU reset button. Resetting SMU should be done
if e.g. memory has been replaced and Mac doesn't want to turn on or is
power management hanged and prevents Mac from starting up.
Diagnostic LEDs are located on mainboard and numbered on silkscreen:
LED 1. Power from AC is good.
LED 2. Voltages (12V?) from power supply is good.
LED 3. Logic board operation, generating video signal to LCD.
LED 4. Should NOT light. Lights up when computer overheats.
Disassembly
Proceed VERY carefully, it's easy to break plastic parts.
1. Put the Mac on a soft cloth, screen on the bottom, stand towards you.
2. In the bottom metal mesh, locate 3 screws and turn them left. They
will not go out, they will not fall off, they will just turn a few turns
and stop - that's all, do not try to remove them or twist them more.
They only cause locking mechanism to shift and unlock, they don't
directly keep case in place.
3. Open the rear plate with base stand slightly utwards you, and then
pull it towards to remove from upper locks. This part is EXTREMELY
BREAKABLE and hard to glue back. You have been warned.
4. RAM, AirPort card, modem and bluetooth can be directly accessed.
5. To get to drives: Remove the metal plate from 2 upper fans, then hard
disk is kept with 3 screws on frame, optical drive with another 3 bolts.