![]()
![]()
![]()
![]()
![]()
![]()
![]()
![]()
![]()


All my content and ptohos

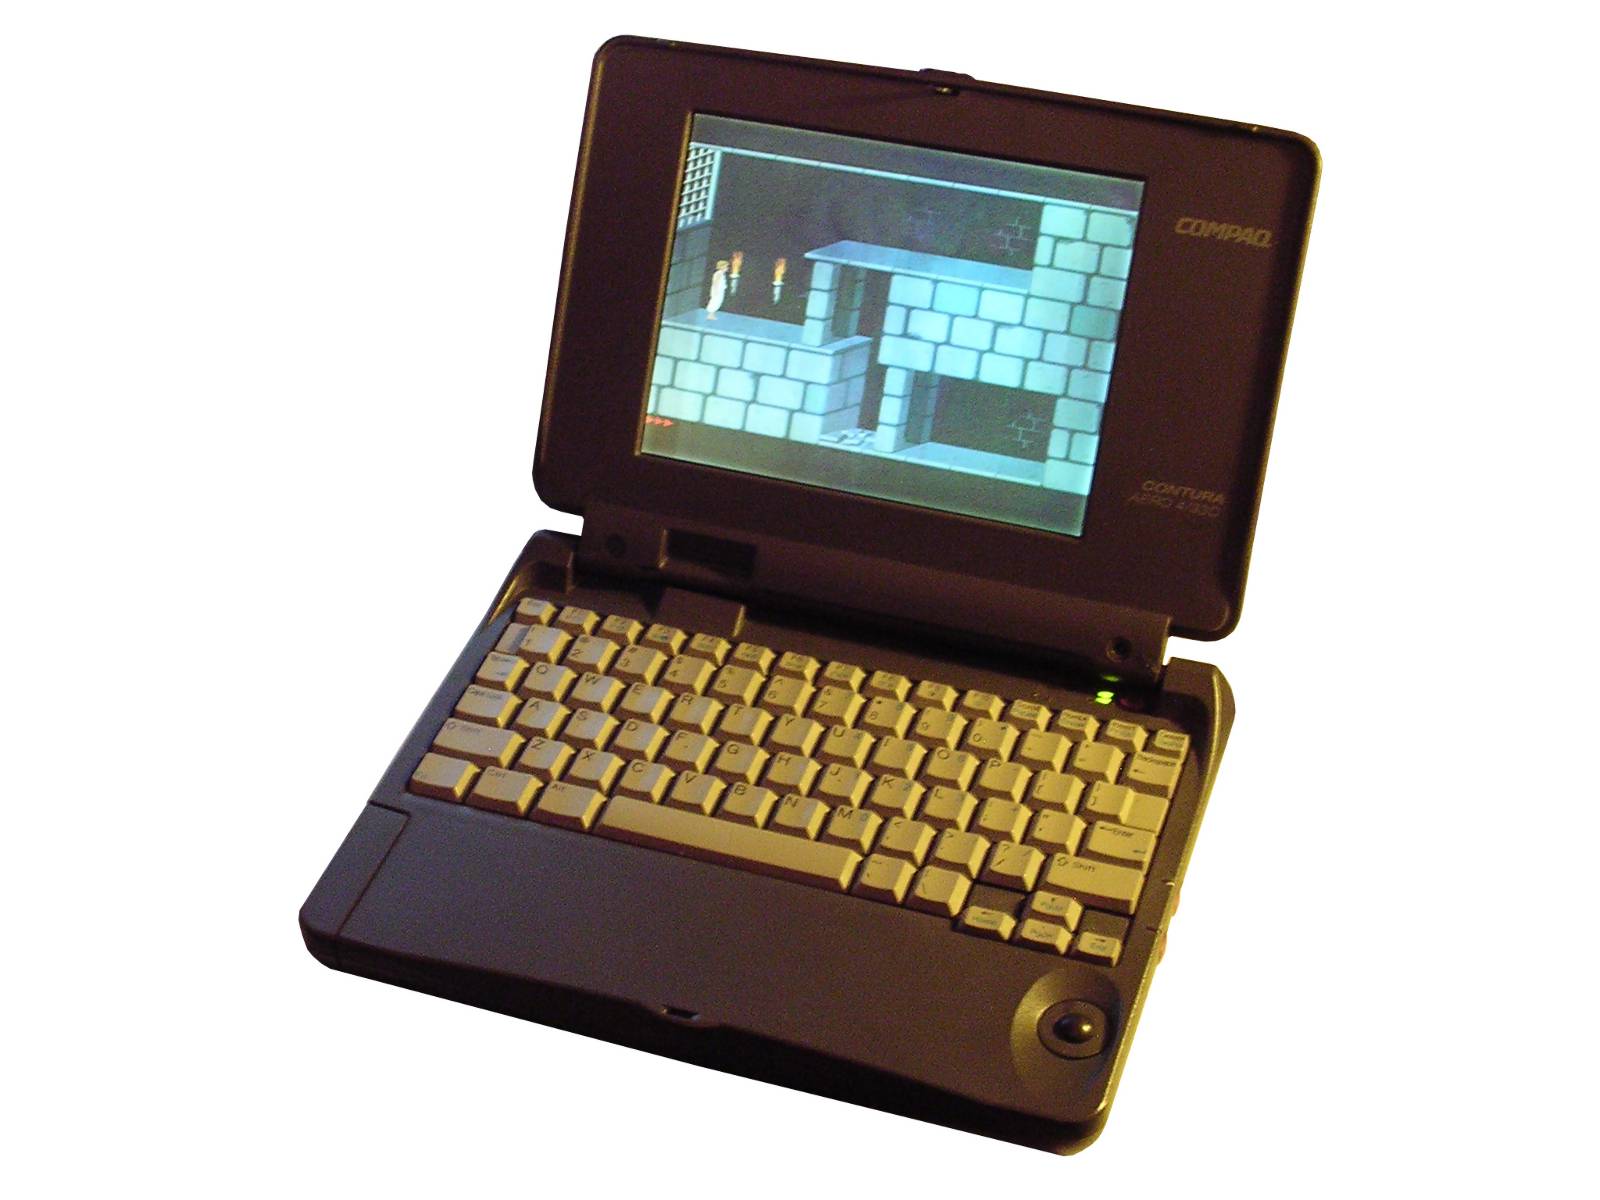
Compaq Contura Aero 4/33C
Compaq released Aero 4/25 and 4/33 small notebook
computers in 1994. They were one of the first computers of small factor,
they had even no floppy disk drive nor CD drive - everything was
external. This gave the machine possibility to be ultra-portable. Compaq
experimented with pointing devices by using trackball in different places - in this
unit is is on the right part of casing while buttons ae located on
its side, in other models they moved trackball to the lid, right below
LCD, while buttons were on the other side - you had to grab it and move
the ball with thumb, pressing buttons with index and middle finger.
The computer had to be energy-efficient, so it has a small, low-power
486SX processor running at 33MHz. On board, there is 4MB of RAM
expandable by modules. Models were equipped with drives from 84MB to
250MB. Aero notebooks were supplied with MS-DOS and Windows 3.x, floppy
drive was PCMCIA-based. Simulatnaously a LapLink-like solution was
pre-installed to transfer data by COM port.
Although video card had 512kB, only 256kB was accessible allowing
640x480 to be displayed.
Because of their small size these computers were quite expensive and
never got true popularity. However there are still some fan-clubs of
these small computers.
| Manufacturer | Compaq |
|
| Origin | USA | |
| Year of unit | 1994 | |
| Year of introduction | 1994 | |
| Type | Laptop, PC | |
| CPU | Intel 486SX, 33MHz | |
| RAM | 4MB, expandable with modules |
|
| Floppy Disk | External only (PCMCIA) | |
| Hard Disk | 250MB IDE | |
| Other media | None | |
| Graphics and display: | LCD display, 640x480 in 16 colors | |
| Sound: | PC Speaker | |
| Keyboard and pointing device: | Small PC keyboard Trackball with 2 buttons located on side. |
|
| OS: | MS-DOS, Windows 3.x | |
|
|
||
|
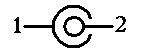
Power supply:
1 - GND |
||
| I/O: | Serial port, parallel port, PCMCIA, dock/expansion connector. | |
| Possible upgrades: |
- RAM Expansion - External FDD |
|
| Additional peripherals: | none |
My unit has been bought in flea market and its origins are unknown. Its hard disk contains Windows 95, installation, a few DOS games and nothing more, especially that disk is severely damaged by bad sectors. I don't have also a floppy drive for it so I can't even replace the hard disk as BIOS Setup partition needs to be restored from floppy disks as in Compaq Presario CDS510. For what I've found, it was bought in Poland and used until 2002-2003 when it fell while operating.
The computer needs PCMCIA floppy disk drive. You may encounter problem while installing operating system from floppies which loads own PCMCIA drivers - floppy may disappear in the middle of preparing to install. The solution is to use hard disk to store installation files or skip PCMCIA drivers loading during install. Some traces point to the hint that this computer can boot from RS232 too, but they are too vague to be used.
|
|
Servcie manual and FAQ |
|
|
Setup and diags disk (SP 2054) |
|
|
BIOS/DOS/Win drivers/tools pack (SPs 0993, 1992, 1454, 1743, 1125, 2158, 1630, 2517, 0891, 0801, 1585) |
| Contents: | Hinge fix and disassembly | Links |
Hinge fix
2019 June: Got two additional units, one with broken hinge, or clutch. This is a significant problem in these units - hinges were made with Zinc-Aluminum alloy, which breaks easily. To fix it, the mcahine must be disassembled.
To disassemble the computer you have to remove
bottom screws and rear screws. Then, top cover can be unlatched. Do it
slowly proceeding from removed battery compartment. The top part then
can be removed.
To remove keyboard, remove upper and lower screws, open it, unlatch
ribbons, remove it. Now you have access to LCD ribbon which you can
unlatch and you can access BIOS battery too.
Now the lid can be removed: First, a right hinge (which usually breaks)
and then slide it off the right hinge's tube. Do not loose the smaller
tube, it has a notch to fit well.
To disassemble the lid, the screws are under round stickers. After
removing them, unlatch the LCD bezel. Now you have access to LCD and
right hinge.
Placing washers between screws and the right hinge's tab prevents
the problem for some time. Especially in the hole closer to the hinge.
If the hinge is broken, avoid opening/closing the lid as it may
damage the lid's threaded holes! ...and the only cure will be to
glue them back with two-compound cement.
As these hinges are unobtainable now, I decided to make
my own part of the clutch. First, removing the broken part, leaving only
the hinge and shaft. To do this, it is needed to hold the broken part in
vice, put a nail or screw in the hole and gently hit it until the hinge
falls off.
Then, I cut an L-shaped piece of metal from an old metal plate from
keyboard and machined it with file to dimensions. This old plate had
square holes for keys, so it was easier to cut using existing holes. The
shorter part of "L" is a bit wider and longer, so it was possible to
grab it into vice and just use the hammer to make a round profile, with
internal diameter like the shaft protruding from the hinge.
The next step was to push the hinge's shaft into it by squeezing it in
vice. Generally the harder it goes, the better.

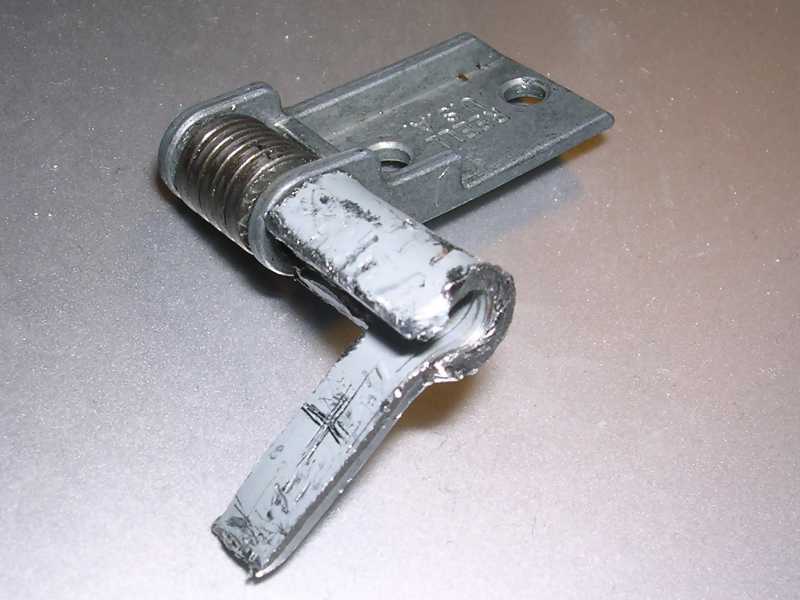

Finally, drilled holes in a longer part of "L" and put it in case as it
originally was. Although this is ready to be installed, there are two
things I recommend:
1. Find a longer screw for the part closer to the keyboard (it breaks
there). Because my re-make was thicker and because point 2.
2. Use a washer between this screw's head and the metal part.
There is literally no sign outside that the hinge is re-made.
https://remember.the-aero.org/ - Webpage with information about
programs, manuals for download and SoftPaqs listed.
http://www.jave.de/aero/aero.htm - Little Aero page -
http://web.archive.org/web/20180106210931/http://www.zenspider.com/~pwilk/aero_stuff.html - Aero stuff -
Links, very good FAQ, diagrams, photos.
http://conturaaero.tripod.com/
- Compaq Aero Land - Information and (mostly outdated) links.
http://web.archive.org/web/20170304223808/http://www.zenspider.com/~pwilk/aero/pinout.html - Base unit
connector pinout (Local mirror)